3. Add a new workspace
The customer account manager can create additional workspaces.
From the , click on the menu.

Click on
 Create.
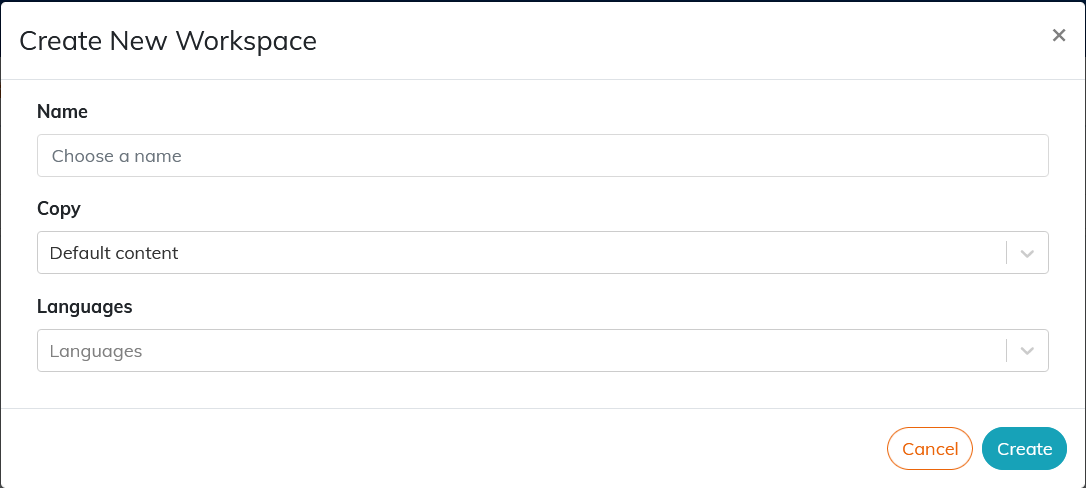
Select the standard “Nothing” configuration to create a completely empty workspace.
Select the standard “Default content” configuration to create a workspace with some basic content (style sheets, images).
Select one of the existing workspaces to create a workspace based on it. Content in the new space automatically inherits all metadata:
tags;
publications;
models;
file labels;
filter attributes;
storage servers.
![[Warning]](cco-warning.svg)
The version history is not preserved.
Any sharing with other workspaces must be configured.
Existing instances of interactive forms will no longer work.
![[Note]](cco-note.svg)
Setting up the new space can take some time (1-2 minutes), depending on the volume of content and its metadata.
| |
The name of the workspace can be changed once it has been created, using the pencil to the right of the name. Each workspace has its own unique url link, which remains unchanged. |