4. To administer workspaces

This page allows:
connecting a workspace to Calenco Translator ;
connecting workspaces in order to authorize the sharing of content between them (Sharing between workspaces);
activating the Workflow option and configure workflow templates (To set up workflow);
adding or removing language spaces To manage languages;
connecting Calenco to external storage servers To connect storage servers;
customizing attributes (To customize attributes);
enable optional features (To enable optional features)
saving or restoring a workspace (To save a workspace, To restore a workspace).
4.1. To customize attributes
The attributes are used to specify these elements for different uses: profiling, specific processing, link...
Calenco offers an interface that allows you to customize the attributes to be as close as possible to your business:
To customize the name of this attribute to match your business vocabulary (facet).
To define a list of values to select them rather than enter them (and avoid typos), when editing or publishing.
Procedure 44. To customize an attribute
Click on → to display the list of attributes:
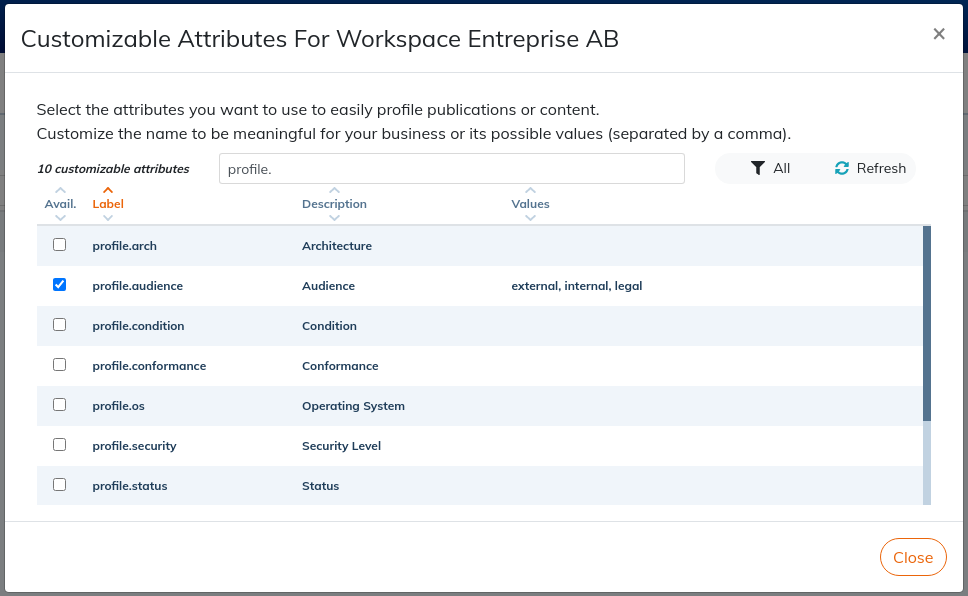
By default, the exhaustive list of attributes is filtered to show which attributes can be used to filter content. Their names begin with profile..
![[Note]](cco-note.svg)
Click on the button to remove the filter and display the complete list of attributes. Interpreting these attributes depends on the style sheet used. Consult Calenco Support for more information.
For example, the
remapattribute is a generic attribute that can be used to specify an element (a list of components is a “classification”).Use the checkboxes to select the desired filter attributes.
If necessary, customize the description of the attribute name.
Enter the desired values for each attribute. The use of this custom attribute is then done in the editor To profile.
![[Important]](cco-important.svg) | |
Customizing attributes at workspace level has no impact on content that has already been profiled. |
4.2. To connect storage servers
4.2.1. To manage servers for storage
This feature enables to connect external storage servers to Calenco: they are services provided by your company. They are used to deposit the publications generated by Calenco on an (S)FTP server, on Miscrosoft OneDrive or Sharepoint server or to send the publications by e-mail (SMTP).
4.2.2. To define an external storage server for publications
| |
For all server types, if you wish to send the document to a specific folder, specify the link to this folder when setting up the publication. (see To configure a publication) |
Click on → to display this window:
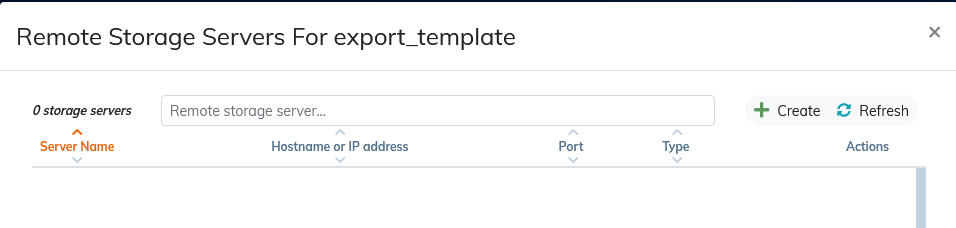
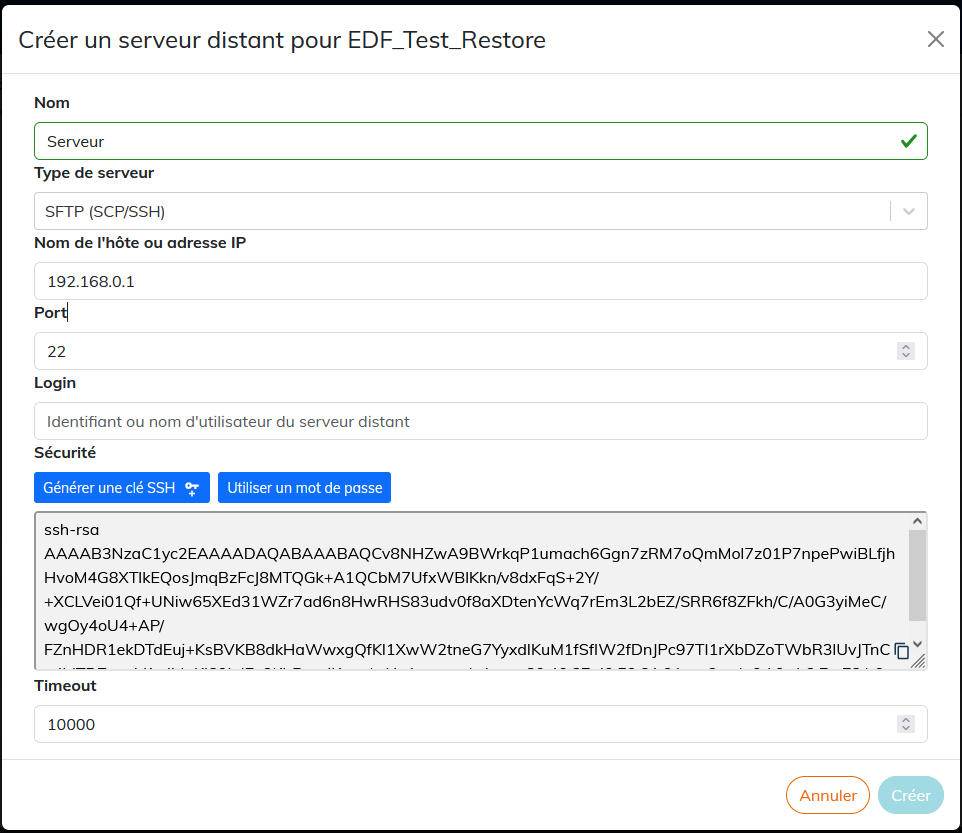
Click on to define connections to storage server in this window: Depending on the type of server selected, the specific fields to be filled in are displayed.
If you decide to use the SSH key, you need to click on the “Generate SSH key”, then click the
 button in the generated key field.
 Then, you can install this key on your SFTP server.
After installing the key on your SFTP server, you can "Validate" the creation of the SFTP storage server.
Calenco performs a test to see if it can connect to the remote server with the provided settings. It is therefore important that you installed the SFTP key on your SFTP server before you committed the server creation dialog box.
Figure 11. Microsoft Sharepoint / OneDrive server settings
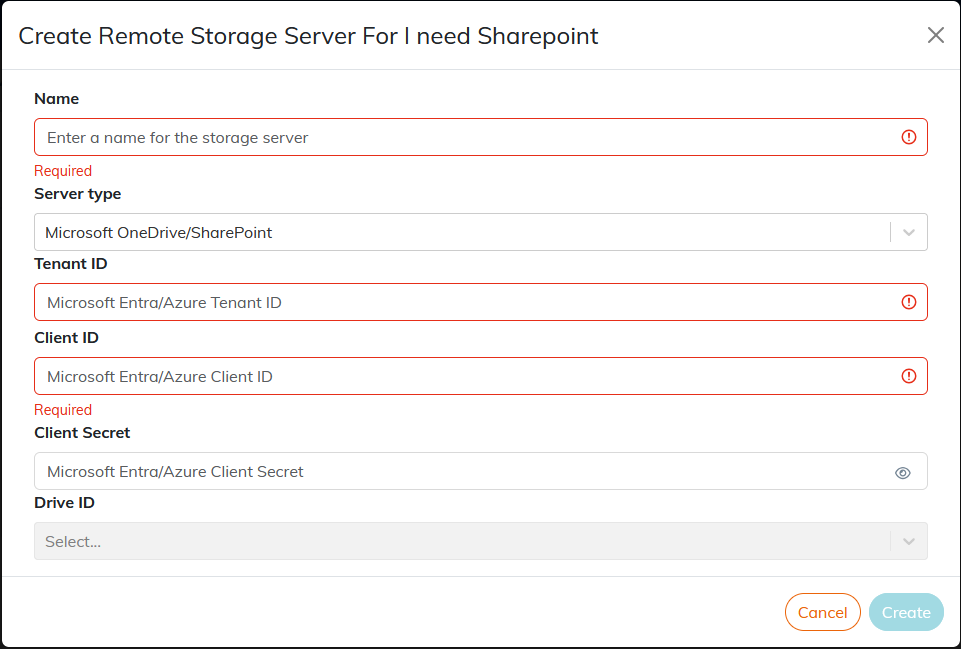
Enable the connector for the relevant workspace to choose the Microsoft OneDrive / Sharepoint type (see To enable Microsoft Sharepoint/OneDrive connector).
Please forward these Sharepoint/OneDrive setup instructions https://neodoc.calenco.com/api/sharedpubs/A5062F5FA4C08F2D5CE05B540E1344FF8B27F64AA4995B5DDEFB533C9E765EAD/browser/ to the relevant department in your company to retrieve the three IDs needed to set up the connector.
Fill in the IDs in the required fields. The disk ID is generated automatically.
Click Create to validate.
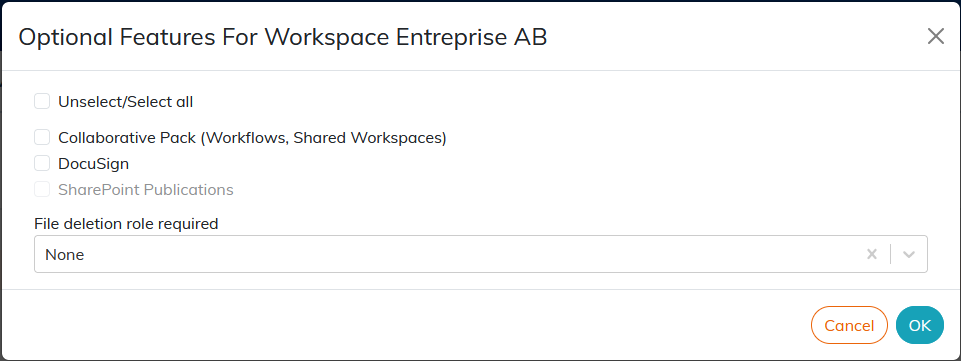
4.3. To enable optional features
4.3.1. To enable the DocuSign Connector
The functionality becomes available once the customer account manager has subscribed to this option in the → (see Manage the subscription,).
The menu, available for each workspace, allows the customer account manager to check whether the DocuSign connector is activated (see To electronically sign a publication).
Go to section To electronically sign a publication to prepare documents for electronic signature.
4.3.2. To activate the collaborative pack
The functionality becomes available once the customer account manager has subscribed to this option in the → (see Manage the subscription,).
The menu, available for each workspace, lets the customer account manager see whether the collaborative package (which includes the workflow (see To set up workflow) and shared spaces (see Sharing between workspaces) features) is activated.
4.3.3. To enable Microsoft Sharepoint/OneDrive connector
The functionality becomes available once the customer account manager has subscribed to this option in the → (see Manage the subscription,).
The menu, available for each workspace, allows the customer account manager to see whether the connector that allows publications to be sent to the company's Microsoft Sharepoint / OneDrive storage server (see To connect storage servers) is activated.
4.3.4. Activate Calenco Translation
The functionality becomes available once the customer account manager has subscribed to this option in the → (see Manage the subscription,).
The menu, available for each workspace, allows the customer account manager to see if the Calenco Translation feature (see To translate) is activated.
Once activated, the workspace is automatically set up to use the export/import package for translation.
| |
To use the translation connector, contact Calenco support to set up the connector for your workspace(s). |
| |
It is possible to have only one option at a time (connector or export/import pack for translation) for a workspace. |
4.3.5. Activate Calenco Forms
The disabled Calenco Forms functionality is available in test mode and restricted operations. The corresponding messages in the dedicated interfaces indicate at which stage it is necessary to activate the functionality (see Subscribe to the feature).
The functionality becomes fully accessible once the customer account manager has subscribed to this option in the → (see Manage the subscription,).
The menu, available for each workspace, allows the account manager to see if the Calenco Forms feature (see Calenco Forms V2) is activated.
4.4. To save a workspace
In the menu of the space to save, click on to display this window:

Read the instructions carefully and select the items to back up.
The Shares option is not visible for spaces with the Collaborative Pack option deactivated. (see To activate the collaborative pack)
![[Warning]](cco-warning.svg) | |
|
4.5. To restore a workspace
| |
If you wish to re-establish share links, before restoring a workspace, activate the Collaborative pack option in the newly created workspace. (see To activate the collaborative pack) |
In the menu of the newly created space, click to display this window:
Select the backed up workspace zip to restore it to this new space.
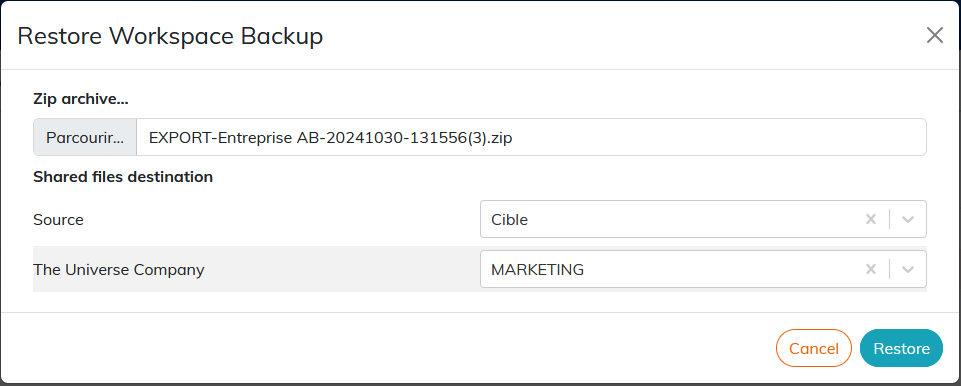
Select the workspaces to which the shared files from this restored space will be redirected.
Leave the field blank if you don't want to restore the shared files.
| |
Depending on the volume of content in the space, it may take some time to restore. Please wait a few minutes to see the full languages and content for the restored space. |
4.6. To clean up version history
The customer account manager can clean up the workspace at the level of the number of existing versions for each content.
In the menu, click to display this window:
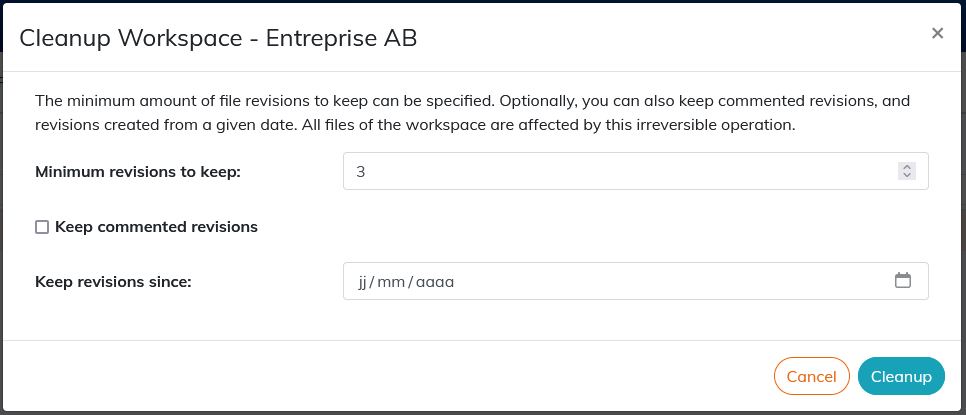
Select and/or specify the desired parameters for the number, type of versions and their creation date.
| |
All content in the workspace is affected by this action. This operation is irreversible. |
4.7. Delete a workspace
The customer account manager can delete a workspace.
| |
This operation is irreversible. If the workspace to be deleted has shared content (reused in other workspaces), these reusable elements in the concerned documents will be indicated by the error message when the document is opened (see Check for missing inclusions). |