5. Page body
This menu is dedicated to the configuration of the elements that can be found next to the text in paragraphs.
5.1. Lists and procedure steps
These menus allow you to:
set list styles and procedure steps styles up to four levels.
set the style of list and procedure step titles.
set the vertical spacing of lists and procedure steps.
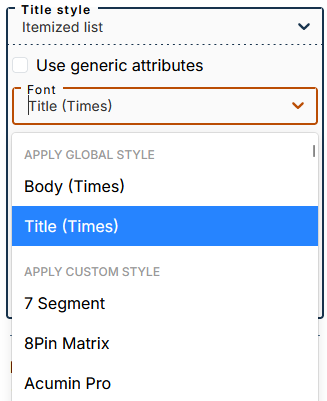
Choice of title style and font
Each type of list and procedure steps has a menu which allows you to set the common style for all these elements but also for tables and figures (see ???).
To customize the style of each element, select its name from the drop-down menu Title style, uncheck the box Use generic attributes.
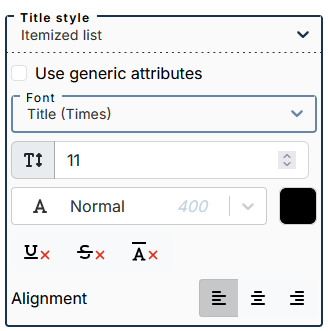
The submenu lets you apply one of two global styles (defined in the menu Global Styles): body or title (applied by default).
You can apply a custom style by selecting a font from this part of the drop-down menu.
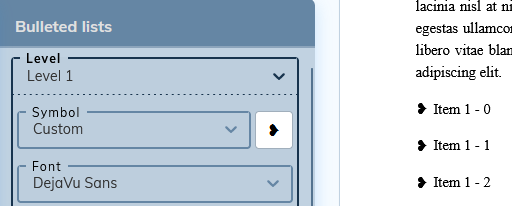
Customize bullets for bulleted lists
The drop-down menu offers a choice of predefined bullets, no bullet, or a custom bullet.
To integrate a custom bullet:
Select “Custom” from the drop-down menu.
Paste the desired bullet symbol into the white square to the right of the menu.
![[Important]](cco-important.svg)
Make sure the custom symbol is supported by the set font.
5.2. Tables
This menu allows you to:
set the style of the title and its position,
create table styles.
The style of the title
Customizing a table title
Select to set the style of the table title.
Uncheck to customize the font and its styles, set the alignment of the title and its position in relation to the table.
Customizing Generic Attributes
Select to set up styles that are common to tables, figures, bulleted lists, ordered lists, and procedure steps.
The submenu lets you apply one of two global styles (defined in the menu Global Styles): body or title (applied by default).
You can apply a custom style by selecting a font from this part of the drop-down menu.
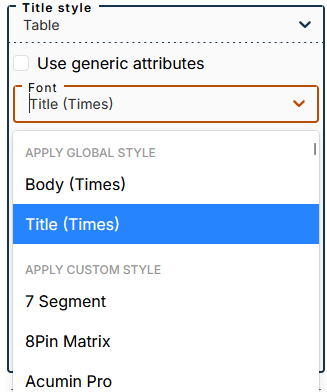
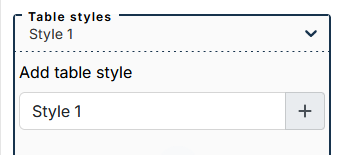
Table styles
This part allows you to create custom styles and assign them to one or more tables within a document.
Procedure 45. To create a custom style
Enter a style name in the dedicated field and click on +. The style is added to the drop-down menu:
Set the desired settings for this style.
Create a new style if necessary.
![[Note]](cco-note.svg)
You can create as many styles as you need.
To edit a style, select it from the drop-down menu.
| |
The style “Default (empty tabstyle)” can be customized and used for tables without attributes |
Procedure 46. To apply a style to a table
In the editor, select the table at the level of
tableelement.In the list of attributes, fill in the
tabstylewith the exact name of the custom style. Below is the example fortabstyle=Style 1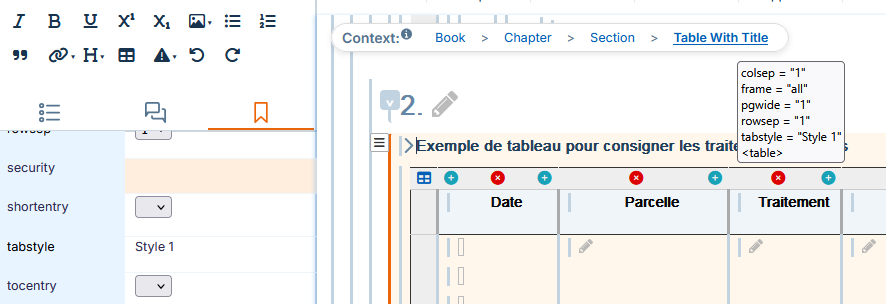
| |
Tables that have the attribute |
5.3. Figures
This menu is used to configure:
the style of the title;
The position of the title in relation to the element.
Customize the title of a figure
Select to set the style of the image titles.
Uncheck To customize the font and its styles, set the alignment of the title and its position in relation to the image.
Customizing Generic Attributes
Select to set up styles that are common to tables, figures, bulleted lists, ordered lists, and procedure steps.
The submenu lets you apply one of two global styles (defined in the menu Global Styles): body or title (applied by default).
You can apply a custom style by selecting a font from this part of the drop-down menu.
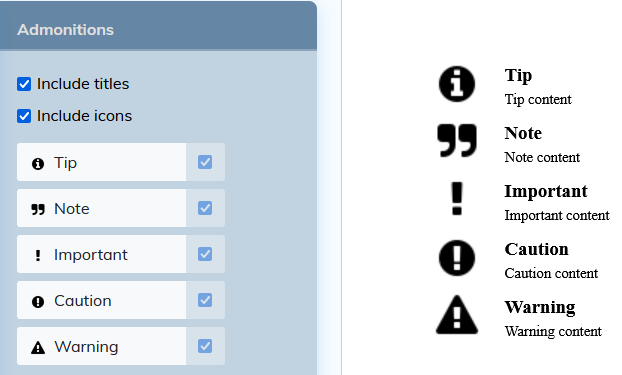
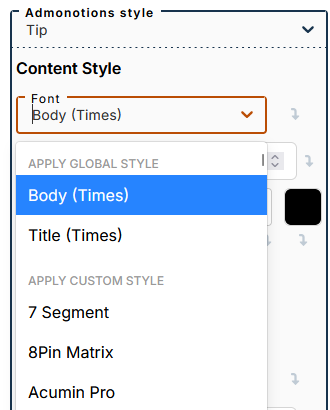
5.4. Admonitions
This menu allows you to customize:
the icons of admonitions;
the style of the titles;
the style of the text;
the style of the borders;
background color.
To customize icons
The default icon preview depends on the content in your workspace that matches those items.
For spaces that contain the standard style sheet, the default preview is as follows:
For spaces that contain the custom stylesheet for admonitions, etc., the preview will show the custom icons.
It is possible to modify the icons:
Click on admonition in the settings panel.
In the window that opens, select an image from the images present in your workspace.
Or import an image via the button at the top right of the window.
Uncheck the box to the right of each admonition to return to the default icon.
Style settings
Settings made in the menu affect all admonition types present in the document.
Select a particular admonition to customize its styles.
Font selection
The submenu lets you apply one of two global styles (defined in the Global Styles menu): body (applied by default for the content style) or title (applied by default for the title style).
You can apply a custom style by selecting a font from this part of the drop-down menu.
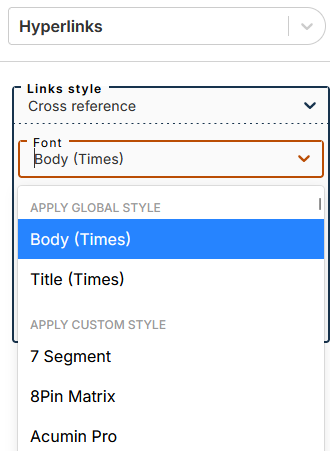
5.5. Hyperlinks
This menu is used to manage link and reference settings:
Cross Reference;
External link;
Internal link;
link to glossary term;
bibliographic reference.
Font selection
The submenu lets you apply one of two global styles (defined in the menu Global Styles): body (applied by default) or title.
You can apply a custom style by selecting a font from this part of the drop-down menu.