6. Assign a form
The features described in this section can be accessed with the Customer Account Manager and Workspace Administrator role.
There are three ways to assign a form to a user or to yourself:
via a lock on an existing form;
creating a form;
via a workflow.
![[Important]](cco-important.svg) | |
In order for operators to access the forms assigned to them, the customer account manager must assign the necessary tags to each operator (see Assign forms to operator). |
6.1. Assign a form via a lock
This feature allows you to:
lock a form on yourself;
lock and thus assign a form to another user;
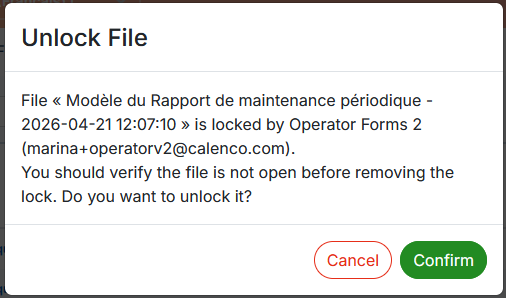
unlock a form.
Procedure 52. To lock a form
In the tab, click
 or in the form menu → .
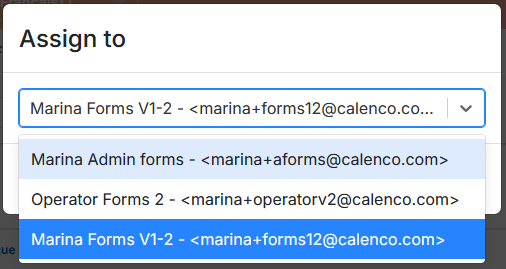
In the dialog box, select your own account or one of the users and confirm your choice:
The locked form is displayed with the orange padlock and the name of the user-owner of the lock:

In order for operators to access the forms assigned to them, the customer account manager must assign the necessary tags to each operator (see Assign forms to operator).
6.2. Create and assign a form
This feature allows you to create a form and assign it to yourself or another user.
In the tab, select a form model, and click on → .
In the dialog box, select your own account or one of the users and confirm your choice:
The created and assigned form appears in the document list. It is locked with the orange padlock and the name of the lock's user-owner:
In order for operators to access the forms assigned to them, the customer account manager must assign the necessary tags to each operator (see Assign forms to operator).
6.3. Assign a form via a workflow
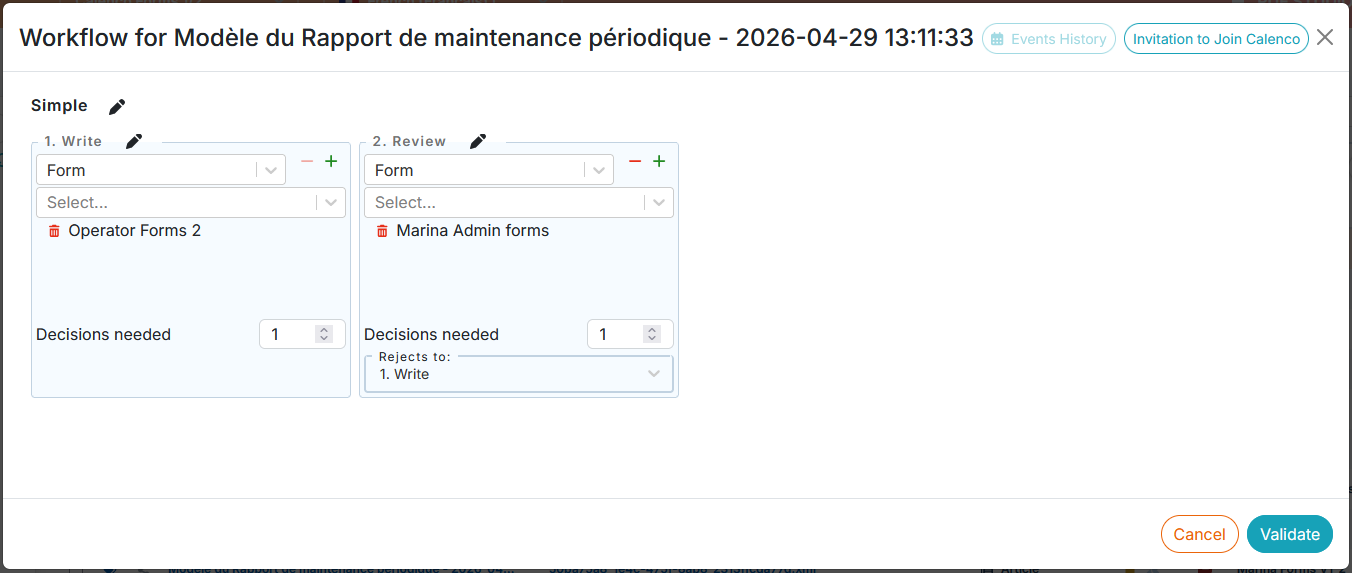
In the tab, select a form, and click on → .
Select a workflow template (see Define a template of workflow).
![[Tip]](cco-tip.svg)
It is possible to create a workflow without any templates. The access level for each step must be set to Forms.
For each step, select:
the people who have to intervene;
![[Note]](cco-note.svg)
Users assigned to a task receive an email when this task of the workflow is active.
The number of decisions needed to move the workflow to the next step;
| |
A completed and synchronized with Calenco form triggers the workflow to move to the next step. |
For other workflow actions, please see: