3. To manage
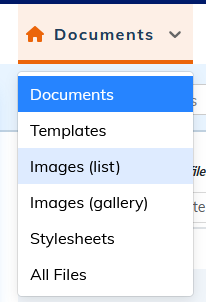
3.1. To display contents
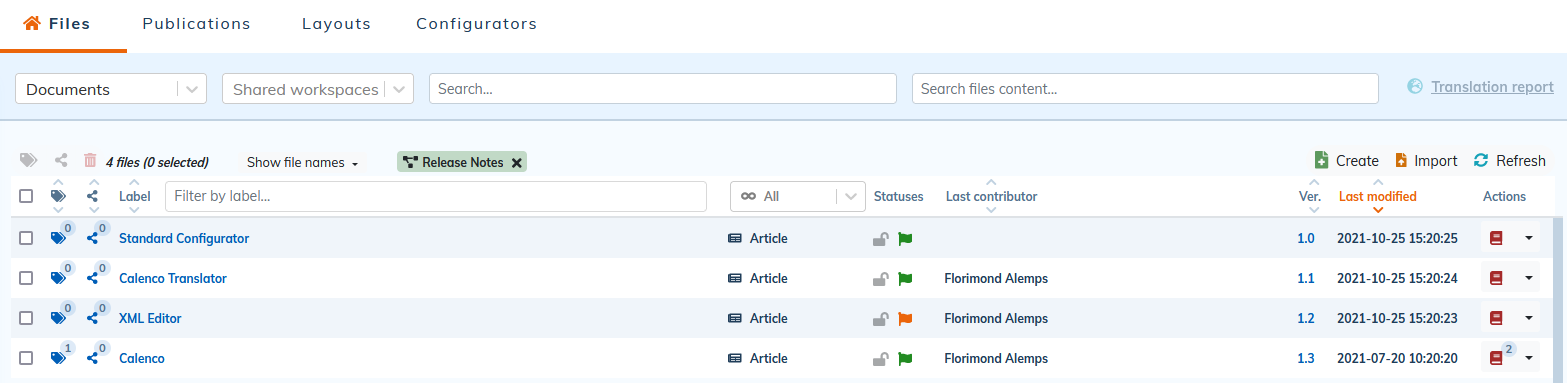
Contents are displayed as a list.
The content labels can be modified by clicking on the pencil that appears when you hover the mouse over the label: this allows each content to be identified more precisely, without any impact on the content itself.
Images can also be displayed in a gallery.
A click on the preview of an image allows:
To edit an annotated image (in SVG format);
to preview the image and get additional information - especially the size which affects the size of your publications.
3.2. To filter content by type
Style sheets are stored in the Common language by default. When selecting this type of content, the menu automatically changes to Common and remains hidden. To select a different language, simply select a different content type.
The option provides an exhaustive list of stored files.
3.3. To filter contents by language
Use the drop down menu to view contents in a given language (created or translated).
Check out the video of How to select a language in the interface:
3.3.1. To manage languages
The contents of a workspace can be produced or translated into different languages. This procedure allows the customer account manager to configure the language spaces of a workspace.
From the , click on the menu.
Click on the menu Actions of your workspace:
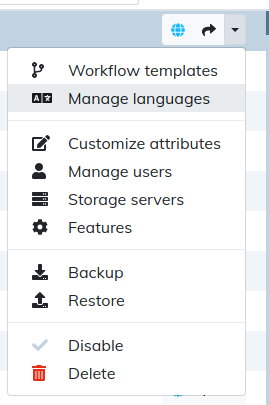
Select :
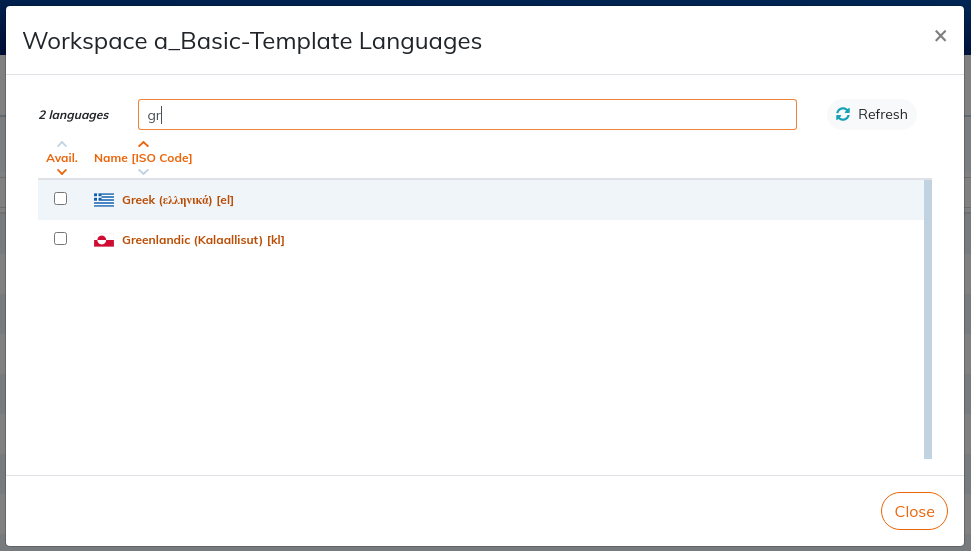
Tick the box to add a language to a workspace.
Untick the box to hide the language from the workspace.
![[Important]](cco-important.svg)
The deactivated language will no longer appear in the affected workspace, but data remains.
![[Warning]](cco-warning.svg)
Variants of the same language are considered by Calenco and CAT tools (Phrase or Smartcat) as different languages.
3.4. To search for content
3.4.1. To sort list
To change the order of the rows (alphabetical or chronological), click on the label of any column.
3.4.2. Search by label, filename, date, last contributor, or format of image.
Enter letters or numbers in the field Search to filter the contents by the label. The first characters are often enough to complete the search.
Erase the entered characters to view the full list.
![[Tip]](cco-tip.svg) | Managing search criteria |
|---|---|
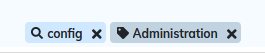
Each time you add a search criterion, to refine, a small tag is displayed above the list: |
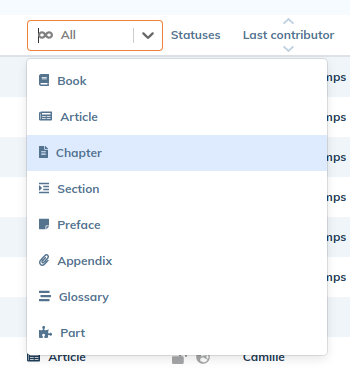
3.4.3. To search by type of element
Documents can be filtered by root element type:
3.4.4. To search in documents
Enter a word or phrase in the field Search files content to find contents that contain that string of characters.
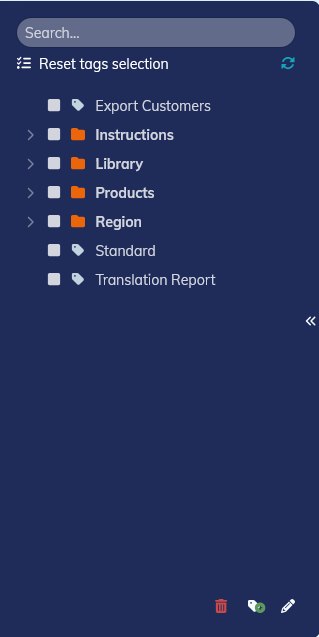
3.4.5. To search by tag
Each content can be associated with one or more tags. One can find the element by ticking the corresponding criteria(s).
3.4.5.1. To create a tag
Click on and follow instructions:
| |
Tags have nothing to do with traditional directories. Tags are more flexible and the search is more efficient because you cross axis of information. It is therefore essential to properly separate each kind of information. |
3.4.5.2. To tag contents
Click the icon  aside the content or at the top of the column when several contents are selected.
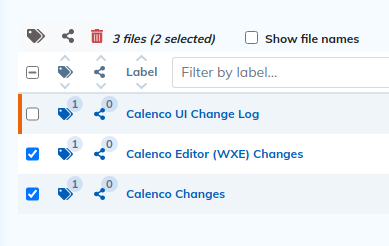
Contents to be (un)taggued are listed at the top of the dialog box.
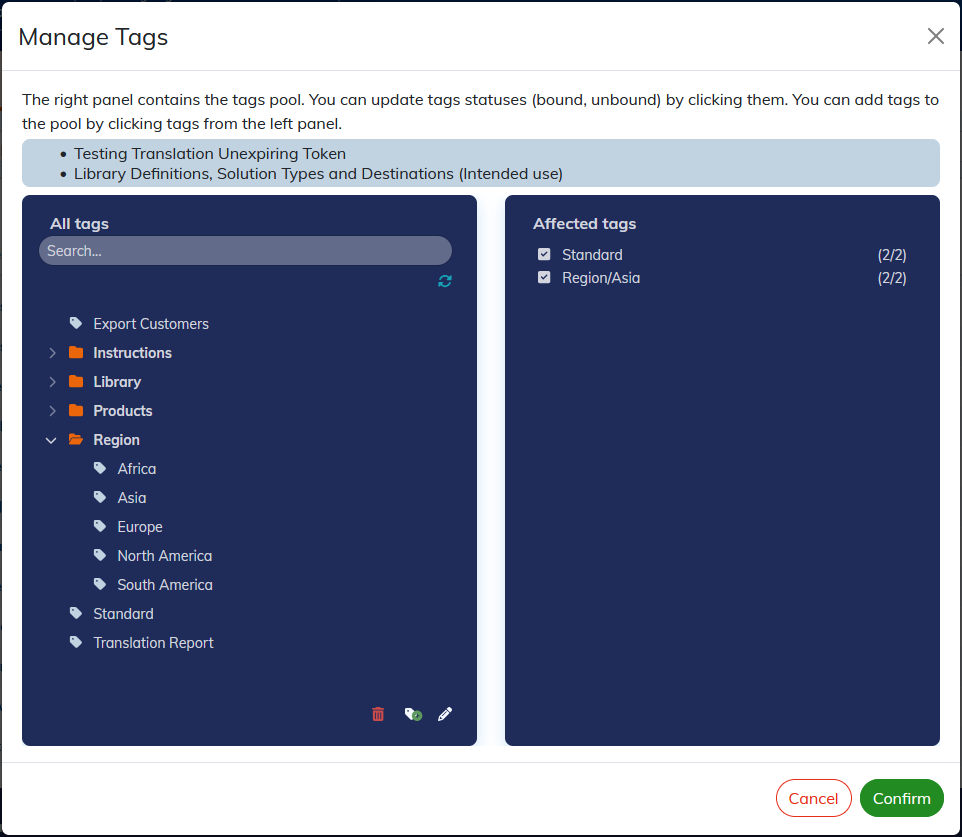
The list of available labels is displayed on the left: a click allows them to be associated with the selected content(s).
Tags associated with the selected content(s) are displayed on the right.
If a tag is not associated to all the selected contents, the box is ticked with -;
If the tag is ticked, it will be associated to all selected contents after validation;
If the tag is unticked, no content will be associated to it after validation.
| Import tagging |
|---|---|
When importing content, all the selected tags are associated with the imported elements. |
3.5. To consult the versions of a file
With each recording or import, Calenco saves a version of a content. The list of versions is accessible by clicking on the identifier of the current version (1.x).
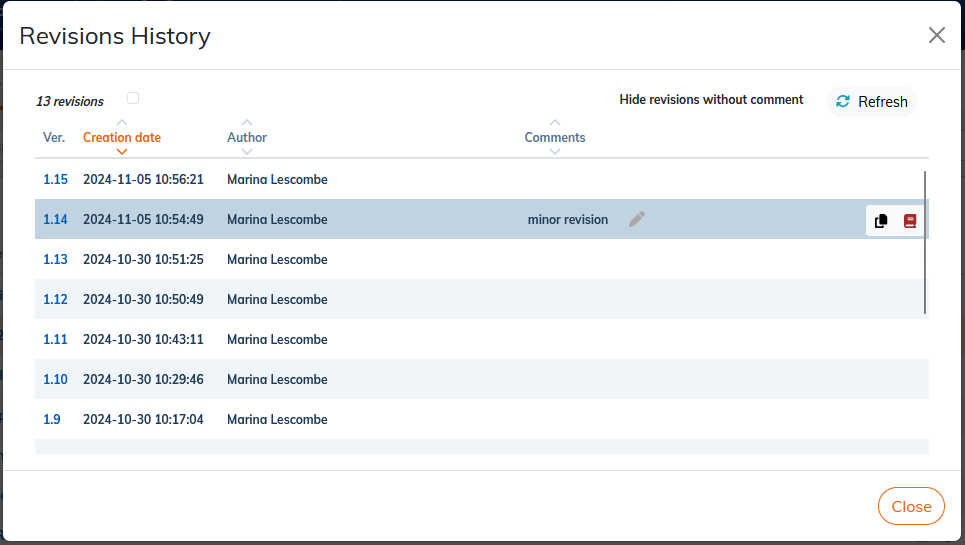
The history lists the following information:
The version (counter);
The date of the version;
The author;
A comment (empty by default).
To add a description, enter text in the field and save with Enter .
![[Note]](cco-note.svg) | Commented versions |
|---|---|
Check Hide versions without comment to reduce the list to versions with comment. |
3.5.1. Recover an older version
You can access an older version of the file.
Click on the version number.
Download it to your computer.
Re-import it with
 Import.
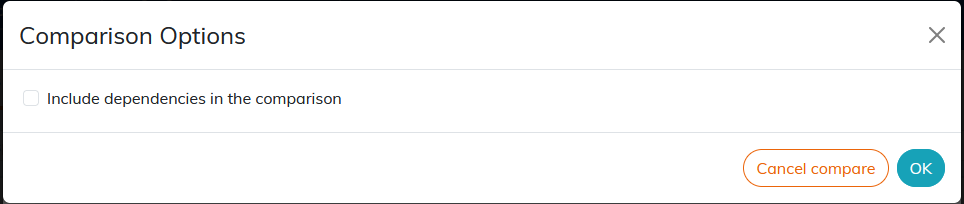
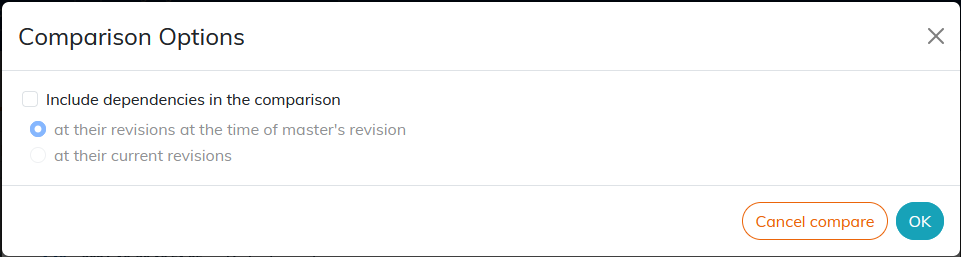
3.5.2. Compare two versions of a document
You can also create a publication comparing 2 versions.
Click the compare icon
 for the 2 versions to compare.
Several comparison options are available for document dependency versions.
If the comparison is between two previous versions, check the box to include dependencies.
If the comparison is between the latest version and an earlier version, it is possible to include dependencies with the choice of their version:
A comparative publication is created. The name of the publication is composed of the DIFF prefix and the identifiers of the compared versions.
Click on it to open it.
A color code is used to identify the changes made:
Removed content : An element of the document has been deleted. Deleted information is striked out and highlighted in red ;
Added Content : A new element has been inserted, such as an image or text. The additions are Underlined and highlighted with green;
Modified content : An attribute value has been changed, indicating a change in the properties of an existing item. Content whose attributes have been modified (e.g. profiling) are displayed in blue.
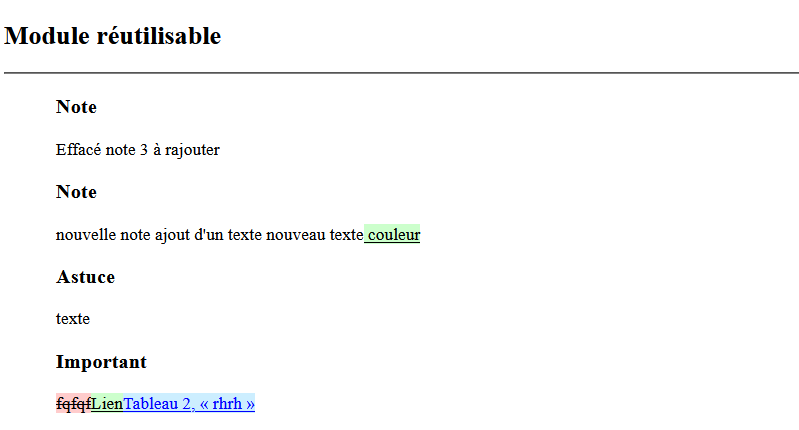
This coloring system allows users to quickly visualize changes between two versions of a document.
3.5.3. To publish a particular version
You can create a publication for each previous version of a document.
Click on the current version number (V1.x).
Click on
 for the version you wish to publish.
Enter the required parameters in the same way as for publishing a current version (see To create a publication). Confirm the creation of the publication.
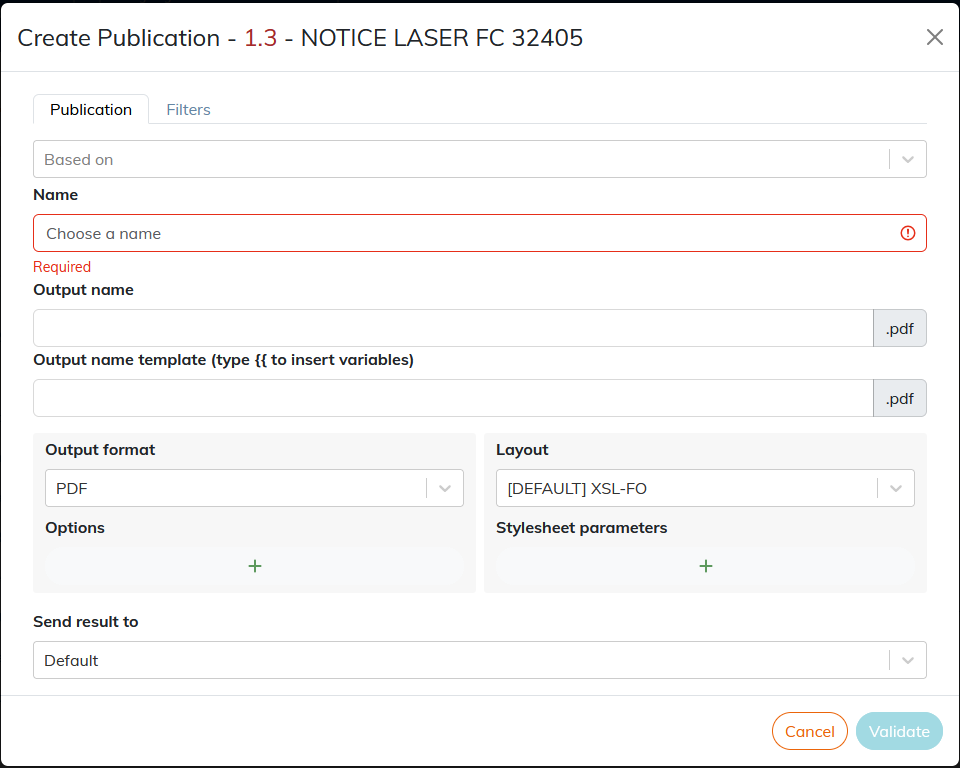
The document version number is displayed in the title of the settings dialog, e.g. “Create publication - 1.3 - Product data sheet B”.
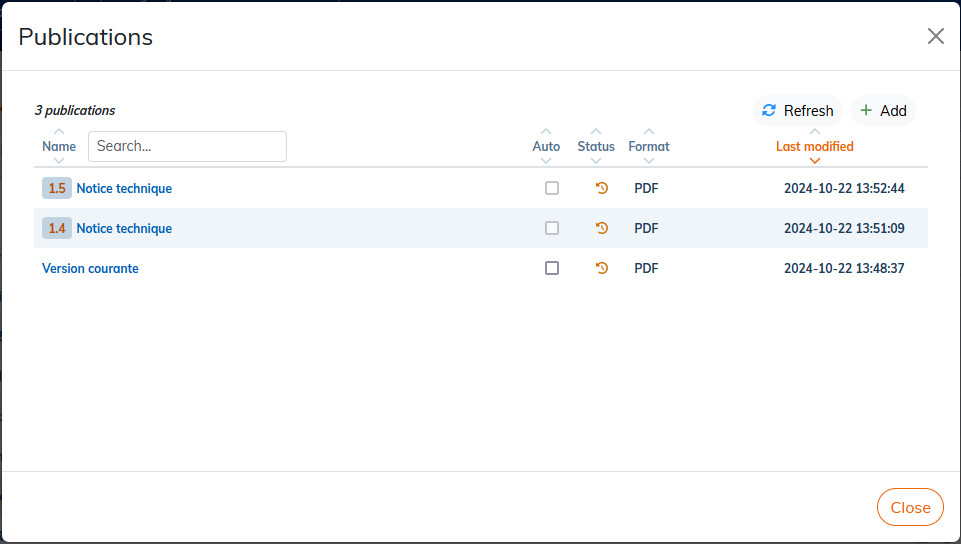
Publication of a particular version is not editable. In the list of publications, it is indicated by a badge with the version number:
| |
If the version that owns a publication has been deleted during cleanup (see To clean up version history), the publication remains available until it is deleted in → . |
3.6. To study the impacts
Before modifying a module or fragment, it is sometimes better to check the where-used cases.
3.6.1. Consult the composition of a content
From the menu → of each content, you can see the complete list of dependencies that make up the :
The file formats displayed in this list :
xml;
svg.
The file types displayed in this list :
dependencies stored in the same workspace as the master;
shared dependencies on other workspaces;
missing dependencies marked with the
 icon.
icon.
The following information is available for each file:
storage language;
name of source workspace for shared files;
type of structure;
number of parent files, their labels and names in the context-sensitive help.
The dependency label can be clicked to open xml files in the content editor and svg files in the svg editor. Shared files open in content preview only.
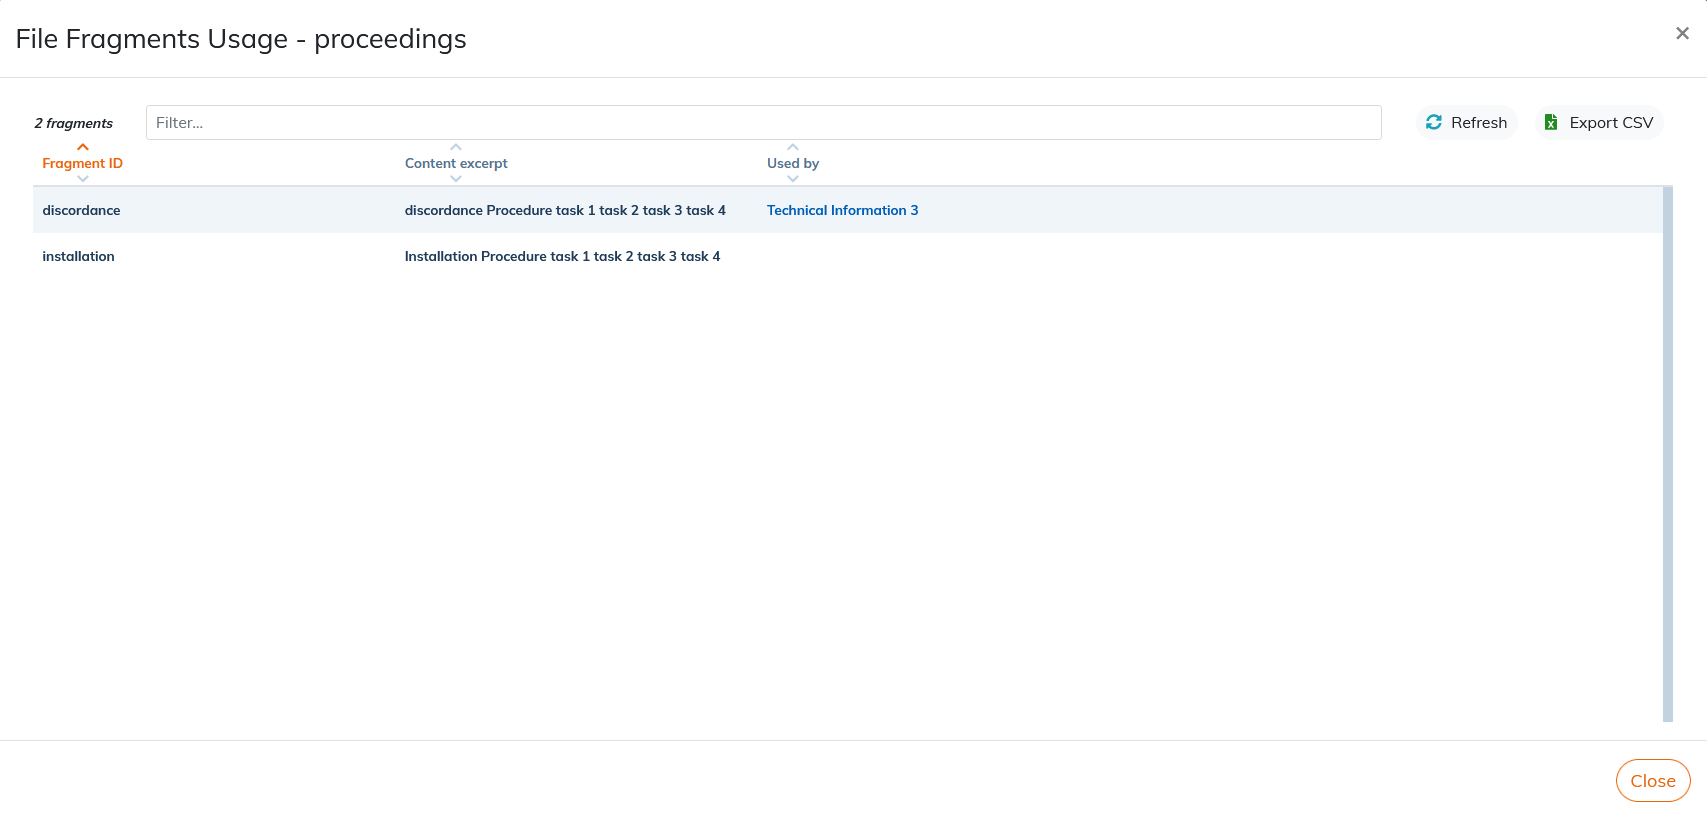
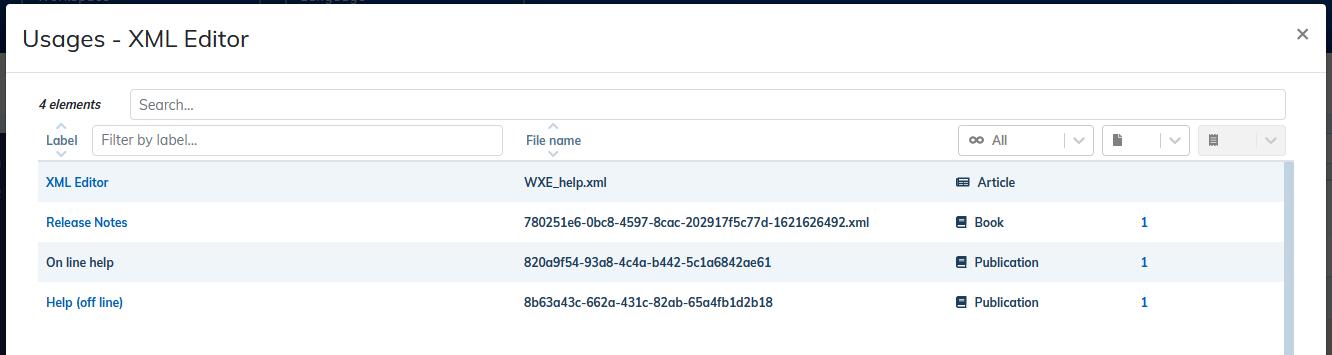
3.6.2. Consult the use of fragments
From the → menu of each content, you can access the list of documents impacted by the use of fragments of this file:
3.7. To compare 2 contents
Click on → on the first file to compare.
Calenco highlights documents with the same type of structure in green: only these ones can be compared.
Select Compare two files in the menu action of the second file to compare.
A comparison web publication is created (HTML, DIFF). Its name is made up with the labels of the 2 files separated by
_vs_.Click on it to open it.
A color code is used to identify the changes made:
Removed content : An element of the document has been deleted. Deleted information is striked out and highlighted in red ;
Added Content : A new element has been inserted, such as an image or text. The additions are Underlined and highlighted with green;
Modified content : An attribute value has been changed, indicating a change in the properties of an existing item. Content whose attributes have been modified (e.g. profiling) are displayed in blue.
This coloring system allows users to quickly visualize changes between two documents.
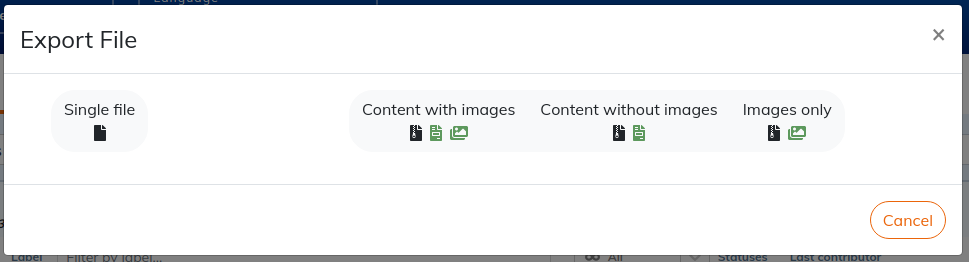
3.8. To export
You can export contents from Calenco at any time. Choose the option that matches your goal:
3.9. Locking a document
In the Calenco interface, the following content can be locked to prevent unwanted modification:
xml files ;
xsl files (style sheets created with the layout studio) ;
svg files.
This feature is available to the customer account manager and workspace administrator for:
locking a file to yourself;
lock and assign a file to another user;
unlock a file.
Procedure 3. To lock a file
In the Calenco interface, click on
 or in the menu → .
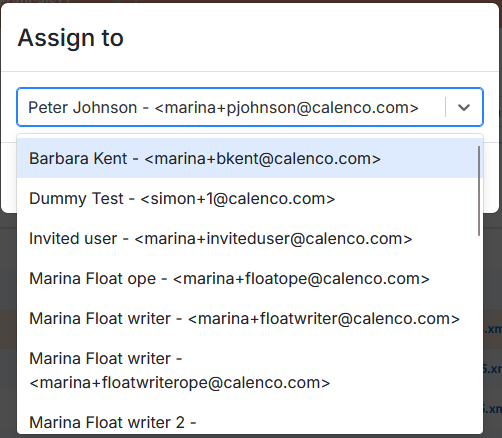
In the dialog box, select your own account or one of the users and confirm your choice:
For customer account managers, workspace administrators and users-lock owners, the locked file is displayed with an orange padlock and the name of the user-lock owner:

Files assigned to another user are read-only in the editor. The customer account manager and workspace administrator can unlock them at any time.
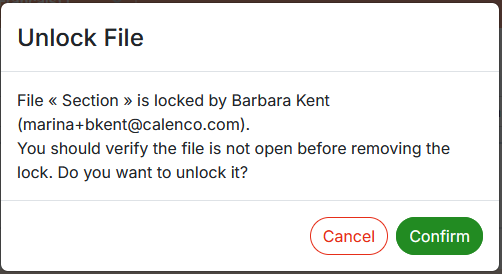
Procedure 4. To unlock a file
Click on its orange padlock.
Confirm unlocking in the following dialog box:
Self-assigned files are automatically unlocked when closed in the editor.
This feature is available to accounts with the User role for:
locking a file to yourself;
unlock the file assigned to yourself.
Procedure 5. To lock a file
In the Calenco interface, click on
or in the menu → .Confirm the lock in the following dialog box:
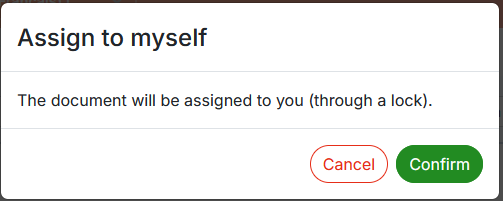
The locked file is displayed with an orange padlock and the name of the user-owner of the lock:
The file is automatically unlocked when closed in the editor.
Procedure 6. To unlock the file without opening it in the editor
Click on its orange padlock.
Confirm unlocking in the following dialog box:
| |
Files locked to other users are displayed with a faded orange padlock |

| |
The customer account manager or workspace administrator can unlock any locked file. |
3.10. Delete files
To delete a particular file, click the menu → on the row of the content you want to delete.
To delete multiple files at once, select the contents you want to delete with the check boxes, and then click the trash bin icon at the top of the list.
| |
Please read carefully the confirmation message for the deletion of file(s). This action is irreversible: the selected content and all their versions will be permanently deleted from the content database. 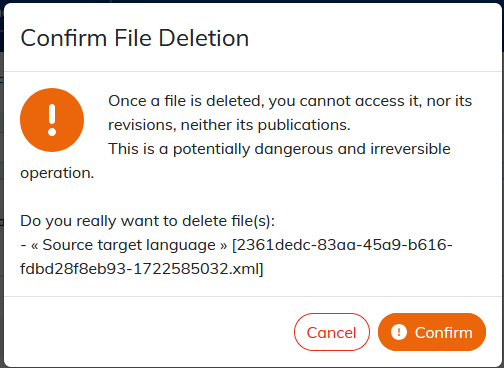 |
![[Caution]](cco-caution.svg) | |
Deleting included or shared content. An error in the form of a notification indicates the impossibility to delete a file, specifying the reason (file locked, included, shared):  Click on the reasons “included”, “shared” to see the usages of the file or the workspaces it is shared with. |