2. To create
2.1. To create a document
2.1.1. To create content
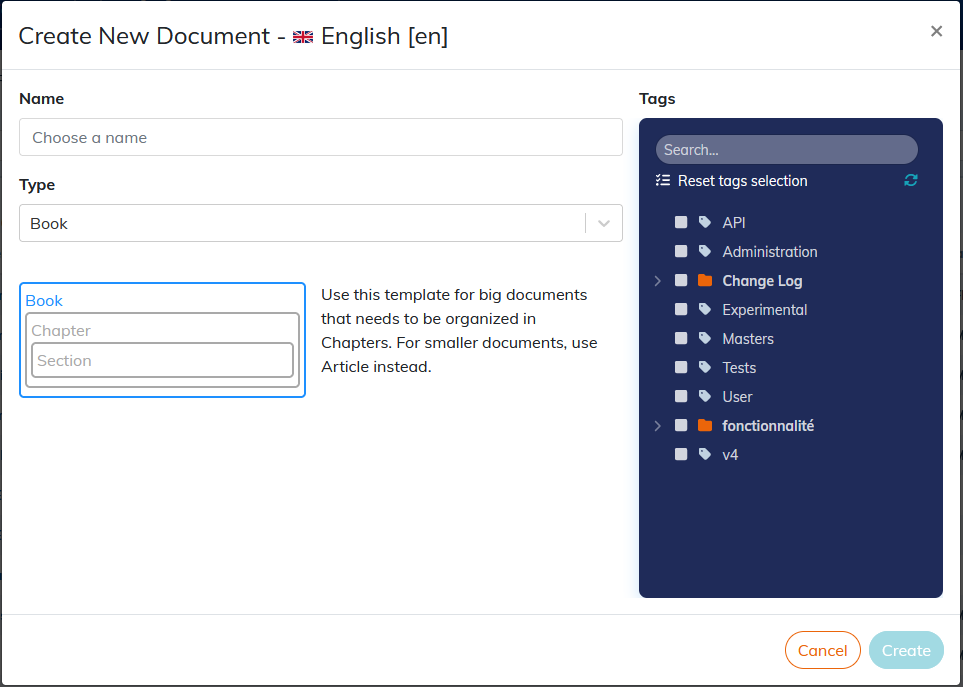
Click on
 Create.
Set a title to the content.
Choose the type of content:
A
bookis a long document, with a complete structure. It is made ofparts andchapters.An
articleis made of sections of different levels.Not being composed of
chapters, the article is preferred to create shorter documents than books.Reusable contents are elements (
preface,part,chapter,section,appendix,glossary,bibliography) that can be included inbooksorarticles.A customized template (see Create a content template).
Associate a label(s) with the content created, if necessary.
Click on : the content editor opens the created content in a new tab.
![[Caution]](cco-caution.svg)
Popup Some browsers (Mozilla Firefox) block pop-up windows: this can prevent the web editor from opening.
Make sure to add the url of the web editor to the list of allowed sites in your browser settings.
The new content appears at the top of the list.
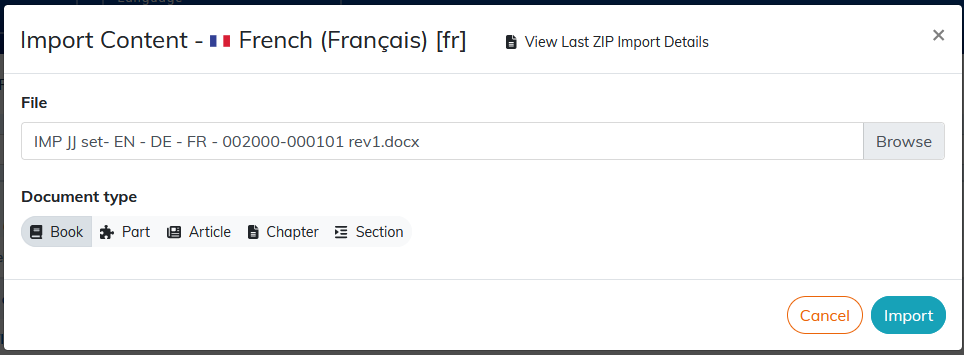
2.1.2. To import content
There are two methods for importing content:
Click on
 Import.
Select content from your PC. Drag and drop it into the Calenco interface.
![[Important]](cco-important.svg) | Import tagging |
|---|---|
When importing content, all the previously selected labels are associated with the imported elements. |
| |
Details of the last ZIP import. In the case of importing .zip archives, the details of the import can be consulted via the button in the Import content window or in the status notification at the bottom right of the screen. The maximum size allowed for a .zip archive is 2 GB. |
Depending on the extension of the selected file, Calenco will propose you some alternatives:
2.1.2.1. To import a .docx file
| |
The import of .doc or .odt is not supported by Calenco. It is recommended that you convert these formats to .docx beforehand. The maximum size allowed is 200 MB. |
![[Note]](cco-note.svg) | |
You can choose the type of document to create. |
| |
Style elements. Before importing, check that the layout elements (table of contents, header and footer, cover page) are not imported. It is recommended to remove them from the .docx to import beforehand. Check that the .docx has a style (level 1 title etc.). After importing, the content is structured according to the levels of titles defined in the original document. |
| |
It is recommended to delete images from large files to speed up the import, and import them separately (see To import an image). |
2.1.2.2. To import an .xlsx file
The maximum size allowed is 10 MB.
To import an .xlsx file, follow the same procedure as for importing a .docx file To import a .docx file:
| |
Tabs and date format. Each sheet of the workbook imported in Excel format ( Dates must be formatted with numeric format with slash only to be correctly interpreted. |
![[Warning]](cco-warning.svg) | |
Cell verification. Watch out for “stray” cells which could lead to the creation of a large number of empty cells. Use the function to check the presence of all the necessary cells (see To insert a table). |
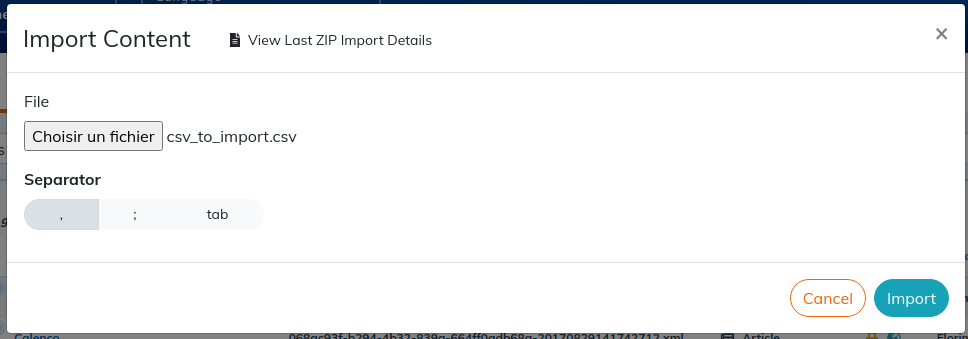
2.1.2.3. To import a .csv file
The maximum size allowed is 10 MB.
Once you choose the data separator, Calenco transforms the data into a table in a section.
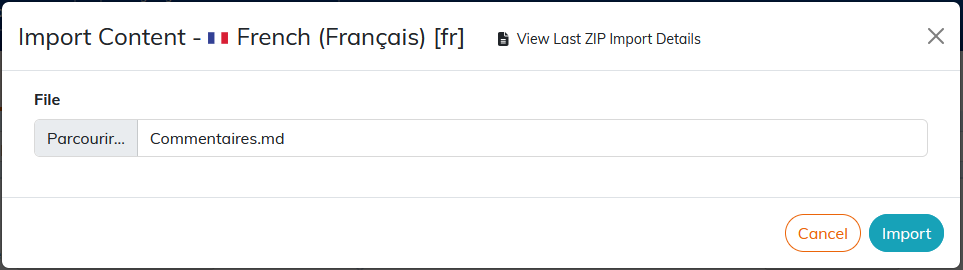
2.1.2.4. To Import an .md file
Markdown is a markup language with the aim of offering easy-to-read and easy-to-write syntax, as is, without formatting.
Import an .md with Import:
| |
If the document contains elements that do not conform to the DocBook schema (for example, a chapter with a title but no content), the import will result in an invalid file with the following message: 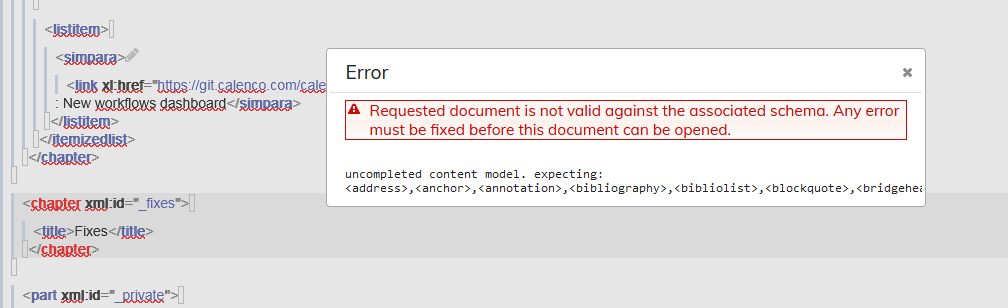 |
2.1.2.5. To import an .html file
HTML files and images must be contained in a .zip archive, without any directories.
The maximum size allowed is 20 MB.
| |
Don't forget to tick the |
2.1.2.6. Import a .pdf file
There are several ways to work with PDF files, depending on the desired purpose:
Different PDF import methods
- Display an image of the PDF pages in an HTML (or similar) publication
In this case, use the function
Import available from the list of documents, or Drag & Drop from the PC to the interface. This will:create a PNG image for each page of the import document, at the resolution chosen during the import. Images are now used as described in To insert an image;
create a reusable content module containing all of these images.
- Display an image of PDF pages in a PDF publication
If you want to get the best possible quality from your PDF publication, it is best to use the original PDF pages. In this case, use the import function from the list of images to import the PDF without transformation.
You can then use this file via the editor with the function To insert a page of a PDF file .
- Modify the content of the PDF to bring it to life
Recent versions of some office suites allow you to import a PDF file and save it in DOCX format - which can then be imported into Calenco.
![[Tip]](cco-tip.svg)
Document structure. The entire structure of the document will undoubtedly be lost in this case, it will be necessary in particular to recreate the title structure thanks to the functionalities of the content editor.
2.1.2.7. To import style sheets
When the Calenco team modifies your style sheets, we provide you with a .zip archive.
Import this file as is, regardless of the selected language.
2.1.3. To modify documents
To edit a content, click on its label.
Editor opens in a new tab.
| Tabs |
|---|---|
Each content is edited in a new tab of your browser. |
You can then work on the document Content editor.
2.1.4. Create a content template
Procedure 1. From scratch
Choose in the drop-down list of types.
Click on .
Then proceed as for To create content.
| |
You can create a new document based on a template from another workspace. Simply share this template with the workspace of the document you wish to create. For more information on sharing content between workspaces, see To share contents. |
Procedure 2. From an existing content
Click on → in front of the document to be duplicated as a template.
The created template is no longer linked to the original document.
Optionally choose a basic publication to associate with the template.
The publication associated to the template will be created and associated to documents created from this template.
This publication can be edited or created after creating the template.
The template can be edited in the editor.
The template is visible in the list.
Content templates can be sent for translation like any other content (see To ask for translation).
2.2. To use images
2.2.1. To import an image
Click on to import an image.
| Import tagging |
|---|---|
When importing content, all the selected tags are associated with the imported elements. |
| Where to import ? |
|---|---|
An image with text should be imported in the corresponding language, to support any translations. An image without text or that is common to all translations should be imported in the language. |
| |||||||||
Bulk import. It is possible to import several images at once with an archive.zip:
|
| |
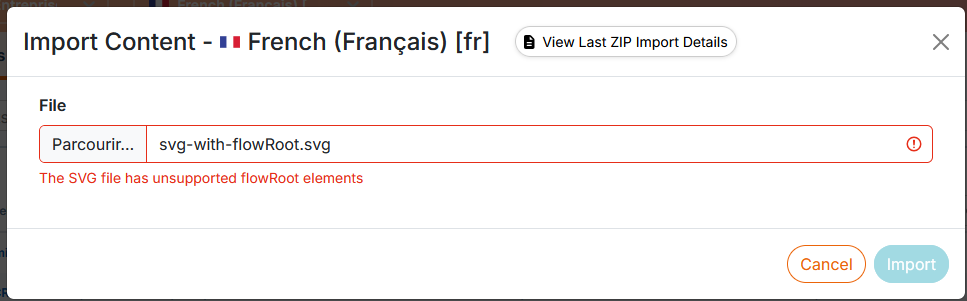
When importing an SVG image containing “flowroot” elements into Calenco, the presence of this element is detected, and the image is rejected to prevent publishing failure. The “flowroot” element is often represented by a bounded area that is blank of text. Just open the image with an SVG editing tool (Inkscape for example) and delete this element. |
2.2.2. Create an annotated image
The SVG format is supported by translation tools: this allows a single image to be shared for all languages.
It is possible to create an image in SVG format of the Calenco interface:
Choose or from the content type drop-down list.
Click on .
The SVG image editor opens. For using the editor see Illustration editor.
2.2.3. To edit an annotated image
SVG images allow annotating photos and drawings. The translation of the texts they contain is simply supported.
Calenco includes an editor for this kind of images. For editing an annotated image see Illustration editor.
Click on the image to edit.
| |
Image title. By default, the title of images created with Calenco is “Layer 1”. This title can be edited in the area to the right of the edit area. |