6. To publish
Publishing consists of transforming a document into a format suitable for its dissemination, via a style sheet that defines its final graphic appearance.
![[Note]](cco-note.svg) | Custom layouts |
|---|---|
Advanced style sheets are not customized by default. They are provided by NeoDoc on demand for a specific layout and data transformation. |
6.1. To create a publication
![[Important]](cco-important.svg) | |
The instructions below concern the publication of the current version of the document. To publish a specific version of a document, see To publish a particular version. |
![[Tip]](cco-tip.svg) | Publications of a document created from a template |
|---|---|
The publications defined on a template are automatically recreated on the instances of this template (Create a content template). |
Click on the
 icon corresponding to the document.
Click on .
Procedure 13. To create a publication based on another publication
Click in the Based on field, select an existing publication.
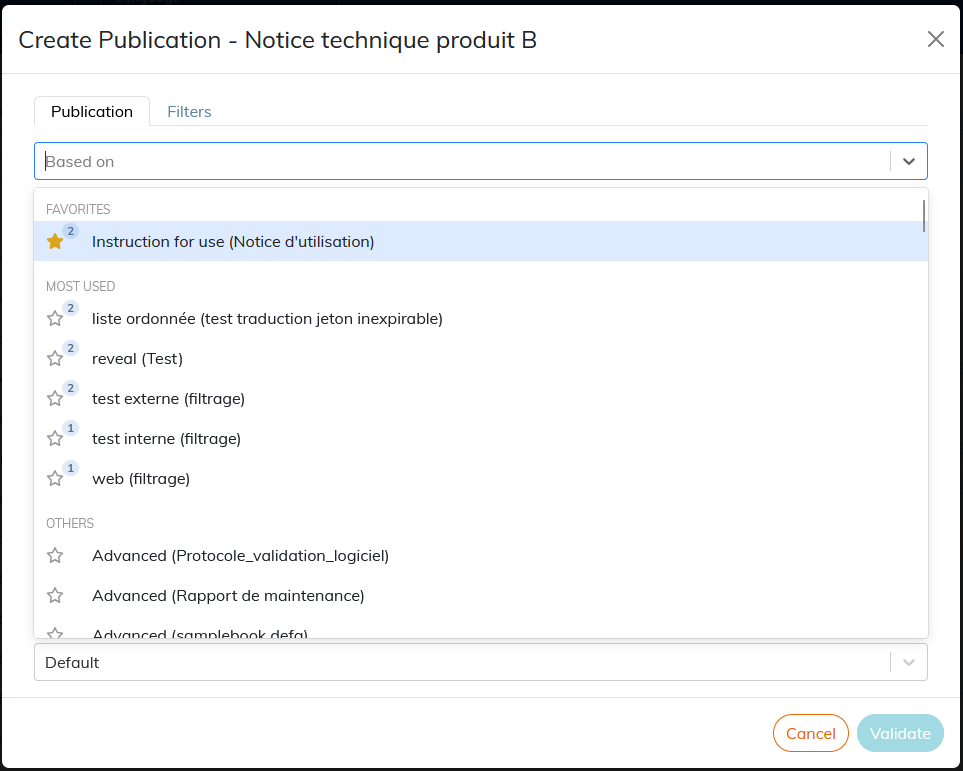
The name of a template publication is composed of [Publication name (document label)].
By default, all publication templates are in the “Others”. As they are used, the most widely used model publications make up the section “Most Used”.
The number next to the star indicates the number of times this publication has been used as a template.
You can click on the star to set the model publications as favorites.
In the field Name, the file name is automatically set with the name of the field Based on. Rename the publication if you want.
All parameters in the template are auto-populated. Set a Output Name Template if necessary.
Click Validate.
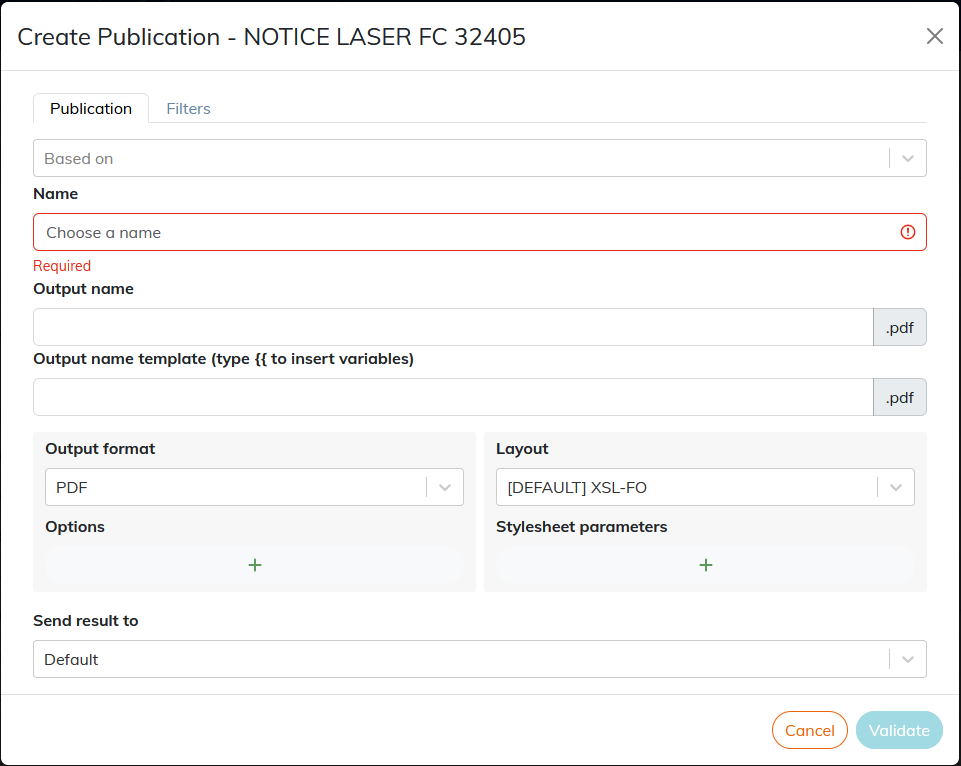
Procedure 14. Create a publication with manual setup
Skip the field Based on and enter a name to identify the post.
Select an output format in the drop-down list.
If necessary, select a layout format.
Click Validate.
| |
Filters. The values selected in the “Filters” are to be applied for targeted publication (see To define the filtering criteria of a publication). |
| |
For more advanced publication settings, refer to To configure a publication. |
6.1.1. To filter content
This feature allows you to filter elements that do not match the goal of the publication. This makes it possible, for example, to generate two versions of the same document intended for two audiences who do not need exactly the same information.
The three stages of filtering
Customize attributes and set their values To customize attributes;
Customizing workspace-level attributes has no impact on content that is already profiled.
To profile elements (To profile);
To configure publications To define the filtering criteria of a publication.
6.1.1.1. To define the filtering criteria of a publication
The customized attributes are listed and their values can be selected without risk of error:

| |
Document content items that do not have any filter criteria are published normally. |
6.1.1.2. Filtering rules and profiling restrictions
For a targeted publication to generate successfully, the filtering information set for a publication and the profiling information set at the content level in the editor must be consistent.
See the most common restriction cases and methods for detecting potential issues impacting publications Detect potential issues related to profiling.
6.1.2. To configure a publication
|
|
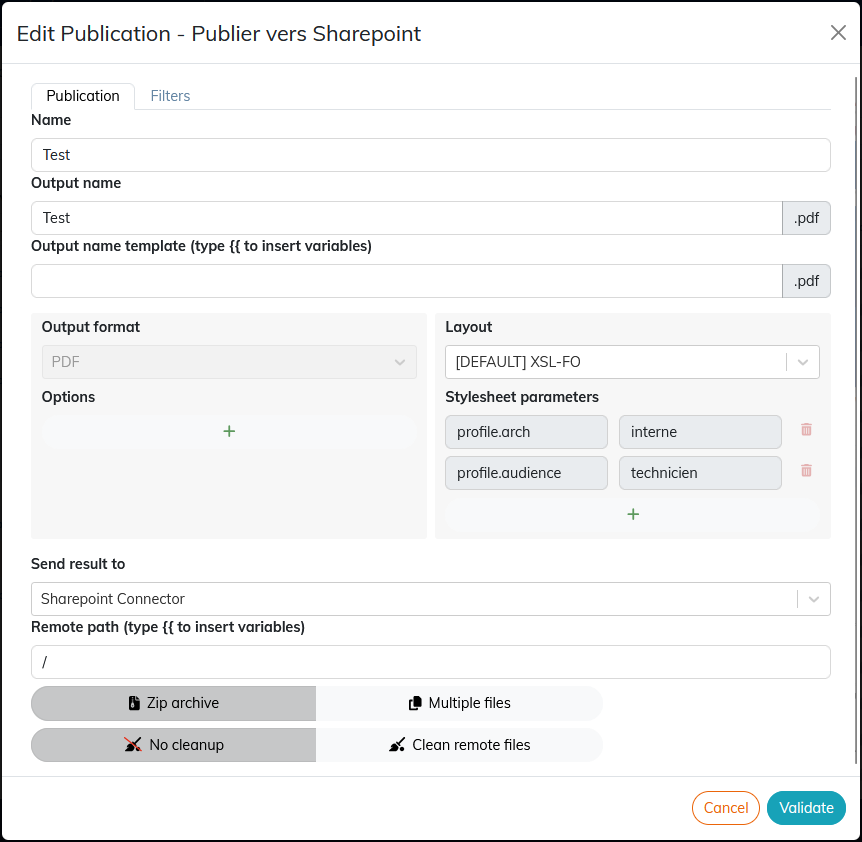
For advanced users, this window will allow to modify all the possible parameters of the publication: Name
Output Name and Output Name Template The output name is assigned to a publication when it is downloaded or sent to an external server (see Send result to). By default, the output name is the same as the name. The output name can be configured:
The available variables are:
For example, by setting the Output format
Options The options are specific to each output format. Main options are:
Layout
Parameters of a style sheet
Send result to
Remote path
|


6.2. To manage publications
You can access the publications either via the ![]() icon of each document, or via the Publications tab of the interface which gives access to all the publications available in the workspace and in the current language.
icon of each document, or via the Publications tab of the interface which gives access to all the publications available in the workspace and in the current language.
6.2.1. Access to the list of publications of a document
This feature list existing publication, eventually to modify or to delete them or to create new ones.
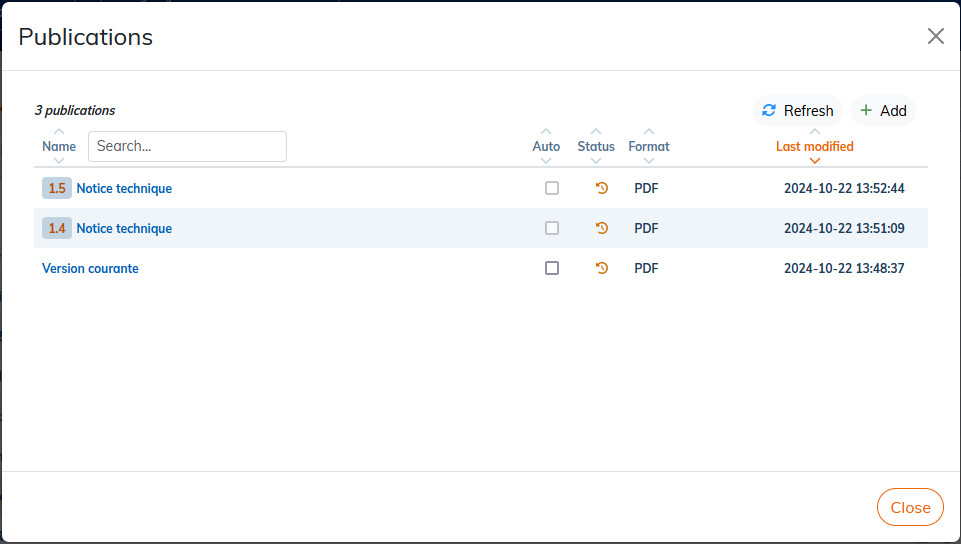
6.2.1.1. Automating
Updating a publication
Automatic: the publication is updated as soon as a content or the style sheet is updated and the concerned file is closed in the editor;
Manual: publication is updated when the user regenerates it.
Tick or untick the box Auto to switch modes.
| |
It is possible to cancel publications being created or regenerated by clicking on |
Interpretation of publication status
 obsolete publication;
 up-to-date publication;
 broken publication. Check the logs in the menu or contact technical support;
 for remote publications, being sent to the FTP server or by email;
 remote publishing failed. Check the validity of the FTP server settings and modify them if necessary;
 published with missing included content. Click on the icon to read the report;
 failed publication with missing included content. Click the icon to read the report.
![[Caution]](cco-caution.svg) | Duration of publication |
|---|---|
If a lot of publications are in automatic mode and you edit content that is reused extensively, all of those publications will be regenerated on each save! This could lead to very long publication times. |
6.2.2. To download the result
You can download the publication on your computer, whatever the format. A publication in Web format is downloaded via a ZIP archive containing all the resources necessary for navigation.
6.2.3. To share a publication
Click on the ![]() icon to share the link to the result of the publication and share it by mail or through other media (LinkedIn, Twitter, FaceBook...).
icon to share the link to the result of the publication and share it by mail or through other media (LinkedIn, Twitter, FaceBook...).
Calenco can also directly create an email containing this link using your email application via the![]() icon.
icon.
![[Warning]](cco-warning.svg) | Data security |
|---|---|
Publication is accessible, without password, to any person having this link. |
6.2.4. To electronically sign a publication
| |
This feature is an option that works in connection with your DocuSign account. After subscribing to this feature in the → , the customer account manager can enable the option via the → in → . |
The  icon allows you to transfer the PDF publication of your document to DocuSign for signature:
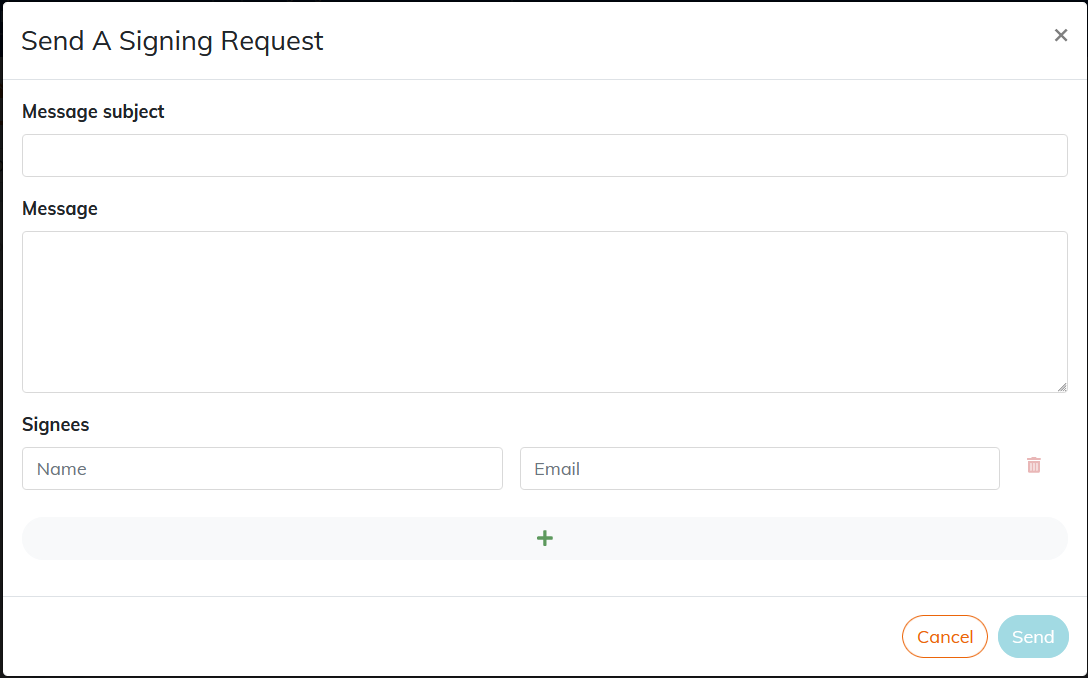
Persons about to sign will receive an email from DocuSign with the subject and body of the message entered in Calenco.
There is no limit to the number of signers that can be set for a document.
Go to section Electronic Signature to prepare documents for electronic signature.
6.3. Reveal style sheet
Using the Reveal style sheet allows you to publish a document in HTML presentation format.
Navigation in the reveal presentation is done via the clickable table of contents or using the arrows positioned at the bottom right of each slide.
| |
If the reveal-calenco.xsl style sheet is not present in your workspace, contact NeoDoc technical support. |
6.3.1. To edit xml content
The structure element to use for writing content is article.
The content is organized between two levels of sections:
each first section level is a slide with horizontal scrolling.
level 2 sections generate slides with vertical scrolling.
The contents are considered as sub-parts of the level 1 section. In this case:
the level 1 section should contain only the title that will appear in all sub-sections in the publication.
the title of level 2 sections can be left empty, if necessary.
| |
Please ensure that the content of each section fits on one slide. This style sheet does not provide automatic advance to the next slide. |
6.3.2. To create a publication
Select the output format: HTML 5 Format (Multiple Pages).
Select the layout: reveal-calenco.xml (or the name given to your custom reveal stylesheet).
6.3.3. Configure the features
Display an image on the cover page
Two methods exist:
Procedure 16. Method 2
In the publication settings, use
titlepage.image.Specify the file path and file name. Example for a file stored in the French language: fr/monfichier.jpg

Procedure 17. Display an image in the footer
In the publication settings, use
logo.image.Specify the file path and file name. Example for a file stored in the French language: fr/monfichier.jpg
Procedure 18. Embed a video
Retrieve the video sharing link from the Youtube page, Vimeo or your server.
In the editor add the
videoobjectelement.For the
videodataelement paste the link in thefilerefattribute.
Procedure 19. Change the number of columns in the table of contents
In the publication settings use
toc.column.countwith the desired value.
Position an image on the page. The image is centered horizontally on the page provided that at least one property of its width or height is indicated.
Successive display of the elements of a slide. The role=incremental attribute can be used to fget successive display of elements in the slide.
This attribute can be applied to a bulleted or ordered list. In this case, each item in this list must be assigned the role=fragment to make them appear one after the other.
| |
It is possible to use other existing functionalities for this style sheet for example:
Their configuration requires specific development for the customization of the provided style sheet. |