5. To translate
The Calenco Translation feature includes two options:
Translation connector: automated translation management between Calenco and the Phrase computer-aided translation (CAT) tool.
Pack export / import for translation: “ manual” procedure for exporting a pack (.zip) of Calenco files for translation in a CAT tool not connected to Calenco, and re-importing the translated versions.
Both options are based on the process of transforming the files to be translated from XML to XLIFF (XML Localization Interchange File Format). The XLIFF format is a standard format in the translation industry and is widely supported by the main CAT tools. Its use in translation management with Calenco allows you to perform theSending only new or modified content for translation since the last translated version.
The choice of one or the other option requires prior subscription to the Calenco Translation feature and its activation for the workspace (see Activate Calenco Translation).
![[Note]](cco-note.svg) | |
It is possible to have only one option at a time (connector or export/import pack for translation) for a workspace. |
5.1. Translation Connector
The option “Translation connector” allows you to connect Calenco to the CAT tool Phrase.
![[Important]](cco-important.svg) | |
Calenco does not provide support or troubleshooting related to the features of the CAT Phrase tool. Please refer to the online help of the CAT Phrase tool or direct your questions directly to the customer support team of this tool. |
Consult the complete Phrase CAT online help.
5.1.1. Administer the Translation Connector
There are several user roles with the Translation Connector option:
Administrator: has all the rights available in the CAT tool.
Project manager: sends translation requests from Calenco, can manage the translation project assigned to him, manage the translation memories and termbases of his project in Phrase.
Linguist: can edit the translation task(s) assigned to him to perform the translation in Sentence.
Depending on the choice of license type for the CAT tool, subscribing to the “Translation connector” and the choice of roles and management rights of the CAT tool can vary:
Table 1. Translation connector offers based on license type
|
CAT License Type |
Subscription to Calenco Traduction |
Necessary roles and rights | |||
|---|---|---|---|---|---|
|
Customer Phrase License |
Calenco subscription Translation and connector configuration |
Autonomous account management: administrator, project manager and linguist | |||
|
Phrase license from the translation service provider (translation agency) |
Calenco subscription Translation and connector configuration |
To configure the connector: project manager at least For Client Access: To be checked with the provider as needed | |||
|
hosting on Calenco Phrase platform |
Calenco subscription Translation and connector configuration + translator (linguist) license
|
Project Manager with Restricted Rights linguist |
5.1.2. Set up the translation connector
The customer account manager can connect a workspace to the Phrase CAT tool to activate the translation.
Settings are made using the account credentials and the “project manager” role created in the CAT tool:
user name (not e-mail address, which is not accepted by Calenco for connector setup) ;
the password.
If you are working with a translation agency, this information must be provided by the agency once it has set up the project manager account.
| |
Each account must be associated with its customer (the customer's name as mentioned in the Calenco tool). |
| |||
To make a translation request in Calenco, the project manager must have the following rights:
In addition to the rights, the client must be indicated in the Relevance section > Relevant Clients. |
| |
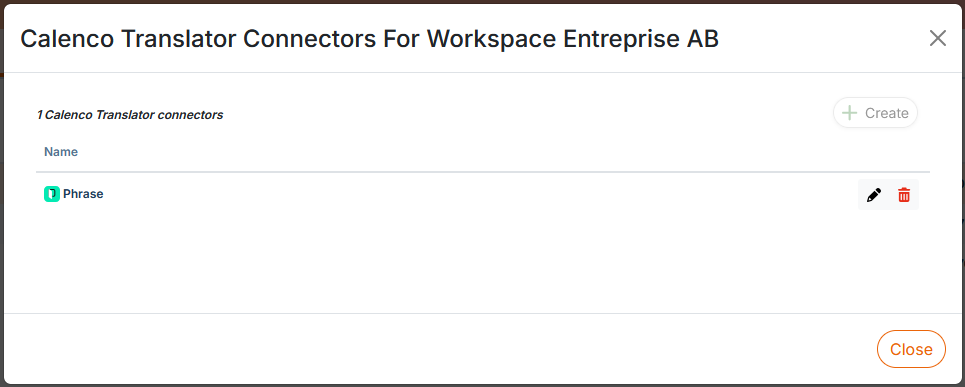
Only one connector can be set up for a workspace. |
For each workspace:
From the menu , click the menu .
Click the menu.
In the window that opens, click on .
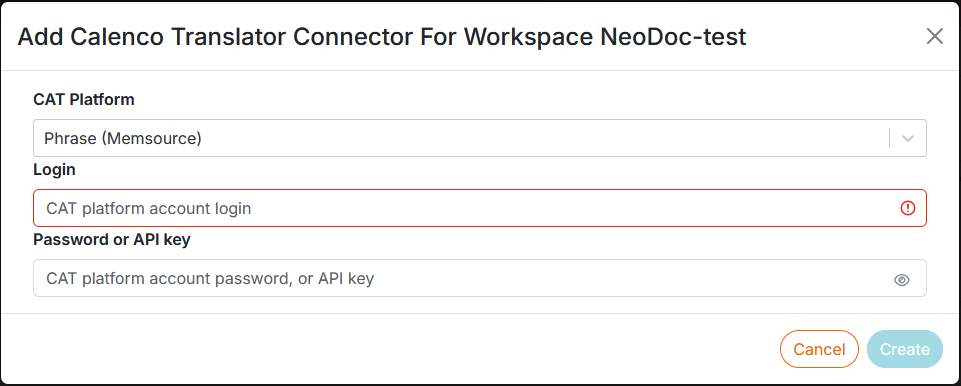
For the Phrase platform, enter the credentials:
login = user name (no e-mail address accepted);
password.
Confirm with .
When the connection is established, Calenco displays:

| |
There is no longer a need to add target languages for the translation connector or in the CAT tool. The system recognizes the source language and the target language and automatically creates respective language pairs in translation projects and for the translation memory (if required) (see Managing translation memories). |
5.1.3. Preparing content for translation
Depending on translation requirements and the type of content, it may be necessary to apply specific settings to source content in the editor.
5.1.3.1. Exclude content from translation
To exclude content from the translation, in the source file :
Procedure 7. Structure elements and block elements
Select the item to be excluded from the translation.
In the list of attributes, give the value “do-not-translate” to the attribute
role.

Procedure 8. Inline elements
To exclude part of a phrase, place this part of the content in the
phraseelement.Select the
phraseelement and assign it therole=do-not-translate.

Procedure 9. Variables
To exclude a variable, enclose it in the
phrase.Assign the
role=do-not-translateto thephraseelement.
Procedure 10. Contents of svg images
To exclude content from svg images, edit the image with the illustration editor Illustration editor.
Select the area with the text to be excluded from the translation.
Give this zone the
class=do-not-translate.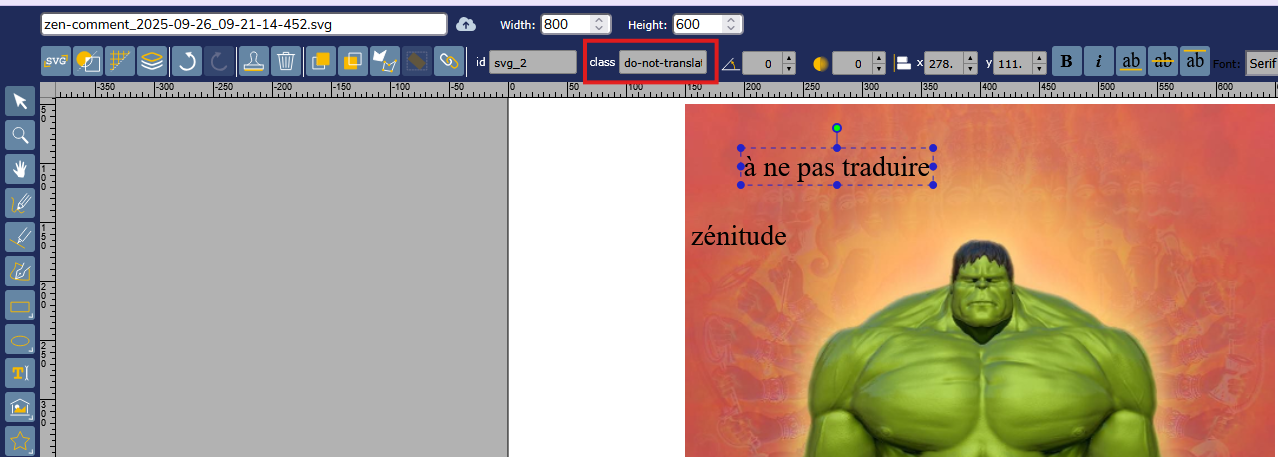
5.1.3.2. Preparing formulas for translation
As a general rule, mathematical formulas should only be composed of universal symbols common to all languages.
| |
The use of words, phrases or sentences in formulas is strongly discouraged. |
If a formula contains words that require translation, you can use the dedicated function in the content editor. It enables the text to be translated to be adapted to the optimum rendering in the CAT tool editor.
In the source document, click on → :
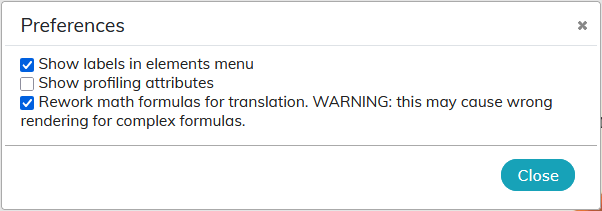
Check the box “Rework math formulas for translation”.
![[Warning]](cco-warning.svg)
This process can have an impact on the rendering of complex formulas in publications.
5.1.4. To ask for translation
| Open dependencies |
|---|---|
If one or more dependency files are open (being edited) at the time of the translation request, the upload fails with the following notification: Save and close all files (xml and svg) and start a new translation request. If the document is locked by another person, users with the role of customer account manager and workspace administrator can unlock it (see Locking a document). |
![[Caution]](cco-caution.svg) | |
It is possible to have several source languages within one workspace. However, we strongly advise against using the same language as both source and target language. This can lead to system malfunctions. |
5.1.4.1. Send a particular file for translation
Choose the → menu on the document to translate.
![[Tip]](cco-tip.svg)
For the very first translation request, click on
 in the Status column for the document concerned.
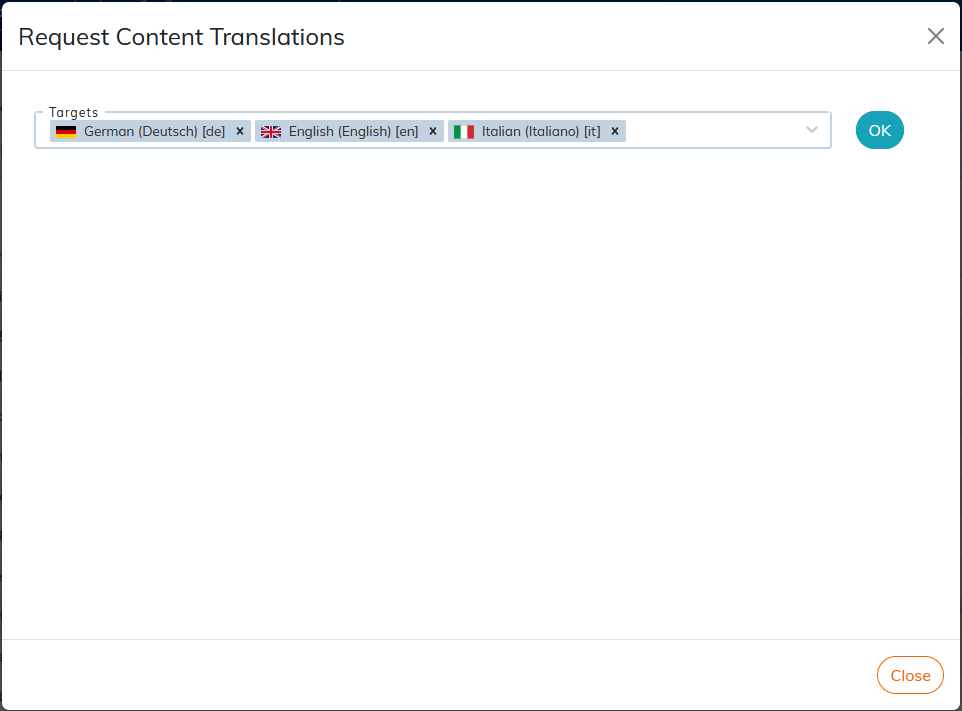
Choose the target languages into which the document should be translated:
The following dialog displays the list of files to be sent in translation with the master document.
Select the content to be sent for translation using the three checkbox options and the translation status by language:
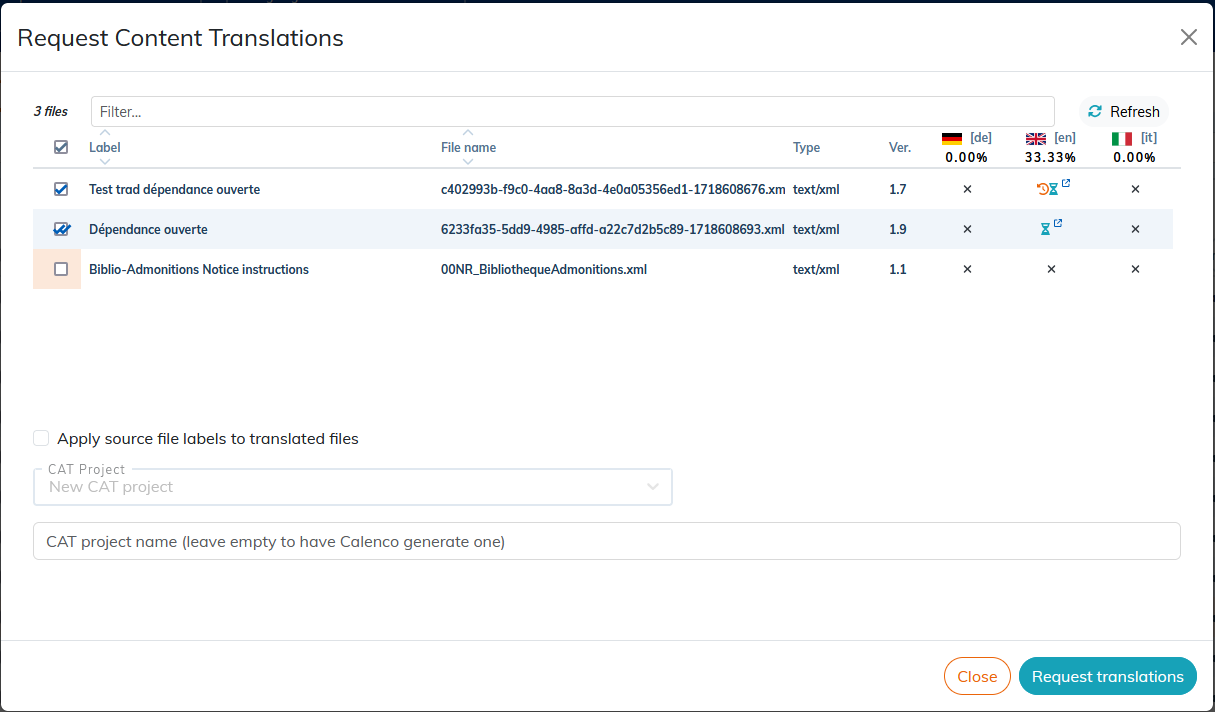
Translation sending options:
 send the file if necessary;
 force sending the file.
 do not send the file.
| |
If a fragment is included, the entire fragment library will be sent for translation. |
Possible translation statuses
 : the file is not translated for the corresponding language;
 : the file has been translated, but some segments are not up to date in the translation;
To update the file, ask for a new translation. Only segments that are not up to date will be translated again.
 : the file is being translated but a new version in the source language makes it obsolete;
 : the file is being translated;
 : the file is translated and up to date.
Apply source file labels to translated files. When creating a document in Calenco or when returning the translation to Calenco, the label of the files displays the title of the document. In order to locate files easily, it may be necessary to keep the labels of the source files for the translated files,
| |
To take advantage of this feature, the initial label must be edited at least once. Each time the label is modified, Calenco asks you if you want to propagate the label from the source file to the translated files. |
There are two other ways to apply source file labels to translated files:
Procedure 11. When sending to translation
When requesting a translation, select the Apply labels from source files to translated files check box .
When you return to Calenco after translation, the labels of the translated files remain identical to those of the source files.
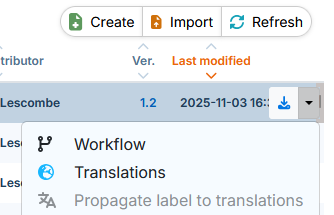
Procedure 12. For existing translations
In the menu for the document that has translations, tap the button.
The modification is taken into account, if the label of the source file has been edited at least once.
| |
The button remains inactive if the label has not been edited and/or the file has no translations. |
Choosing a CAT project

| |
It is important that Calenco users and their translation service provider work together to define the naming convention for translation projects and establish the rules for selecting projects according to the options described below. |
The file can be sent to:
an existing project on the CAT platform. Just choose this project from the drop-down menu.
a new project with a custom name that will be created automatically on the CAT platform.
Leave the Project name field blank so that Calenco generates a default name.
The project name is composed of the following elements: Calenco [workspace name] [date] [time]. For example: Calenco Entreprise AB 2024-01-02 10:22:42.7231.
Click .
Click on in the notification at the bottom right of the screen to see the set of files sent for translation:
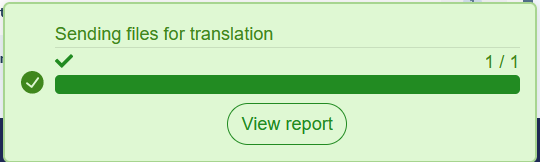
Translation requests made in Calenco are received by a project manager in the CAT Phrase tool.
5.1.4.2. Send multiple independent documents for translation
In the Calenco interface, in the list of documents:
Select the documents that need to be sent for translation.
Click on the blue globe at the top of the selection column:
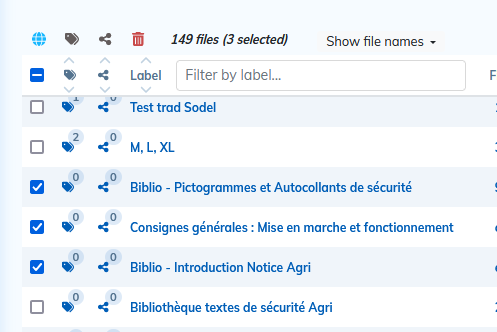
The Request Content Translations window opens. Proceed with the request settings as described in Send a particular file for translation.
5.1.4.3. What is sent for translation?
When you select a file for translation, the following files are sent - if they have been changed since the last translation in the same target language:
the file itself;
the contents included in this document;
SVG illustrations included in these documents.
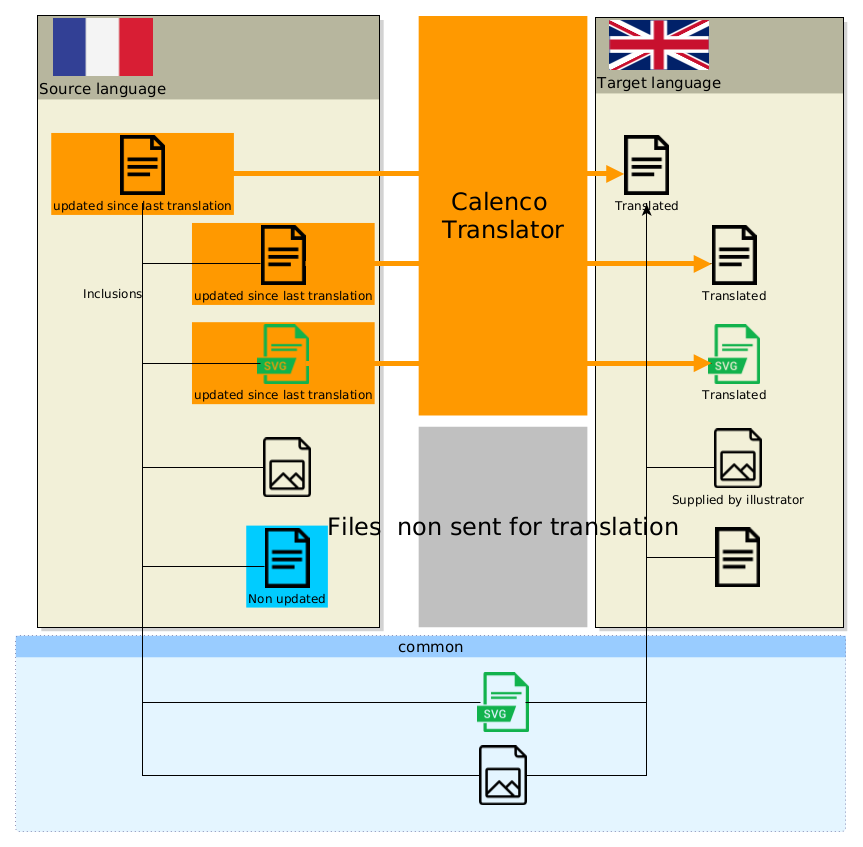
| Translation of images |
|---|---|
Apart from images in SVG format, images are not translated. The writer must produce the images in the target languages - with the same file name as in the source language (see To import an image). However, bitmap images (png, jpg, gif) are part of the translation report for better visibility of missing images in the target language (see Translation tracking). Their translation status is linked to the modification date in Calenco. |
| |
Translating Shared Inclusions. In the case of the translation of inclusions coming from a shared space, it is necessary to ensure that the two workspaces have the same source language. Shared files, the source for inclusions, must be sent in translation from their native / source space. (see Sharing between workspaces). |
| |
Translation of commented documents. Comments in content sent for translation are filtered before sending to the TAO Phrase platform. |
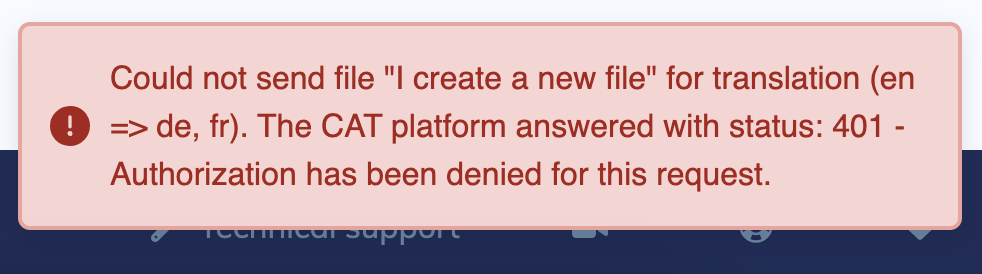
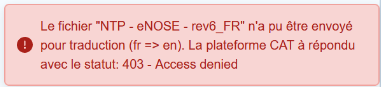
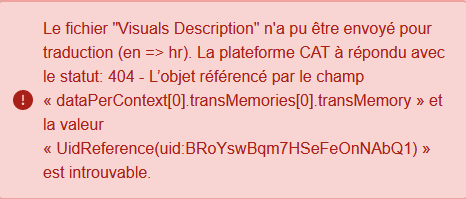
5.1.4.4. Why does sending for translation fail?
Account settings (see Set up the translation connector) that is not complete or modified in the CAT Phrase tool is the cause of the inability to send documents for translation. Most of these error cases concern Calenco users who send their documents for translation to their translation agency's CAT Phrase tool or Calenco users who own their own CAT Phrase tool license.
The table below contains examples of error messages, how they are interpreted, and how to fix them.
Table 2. Troubleshooting for failed translation sending
|
Error message |
Diagnostic |
Corrective actions |
|---|---|---|
|
Impossible to send translation from Calenco (no “Translations” button in “Actions” menu). |
The Calenco Traduction subscription is not activated. The connector is not set up for the workspace in question. |
Subscribe to Calenco Translate and activate it at the workspace level (see Activate Calenco Translation). Wait for NeoDoc to confirm the connector settings for the workspace(s). |
|
The “Translations” is active in the menu “Actions”, but the translation request generates a zip archive. |
The connector is not set up for the workspace in question. |
Wait for NeoDoc to confirm the connector settings for the workspace(s). |
|
|
The login and/or password have been changed. |
Please send updated information to NeoDoc. |
|
|
The rights of the Project Manager account have been changed or restricted (see Set up the translation connector). The name and/or ID of the translation memory has been changed Managing translation memories. |
Check your account settings. Please send updated information to NeoDoc. |
|
|
The name and/or ID of the translation memory has been changed Managing translation memories. |
Please send updated information to NeoDoc. |
| |
For problems returning translation files, see Why has the return to Calenco failed?. |
5.1.5. Translation tracking
5.1.5.1. Translation report for a source document
The ![]() icon provides access to a translation report of the relevant document and its dependencies in all target languages.
icon provides access to a translation report of the relevant document and its dependencies in all target languages.
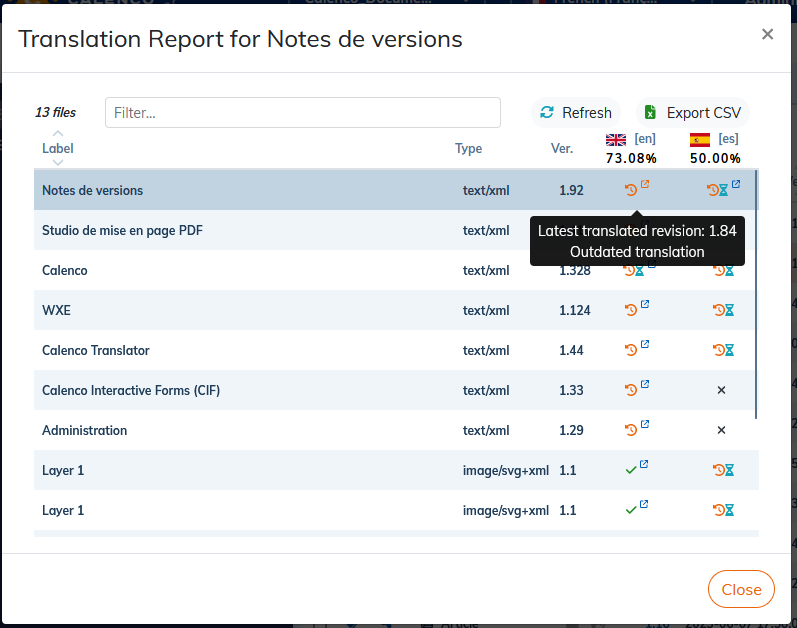
The search field is used to filter the lines to display, for example, only the obsolete translations.
The column Ver. Specifies the version number of the source document. By hovering over the translation status, the number of the last translated version is displayed.
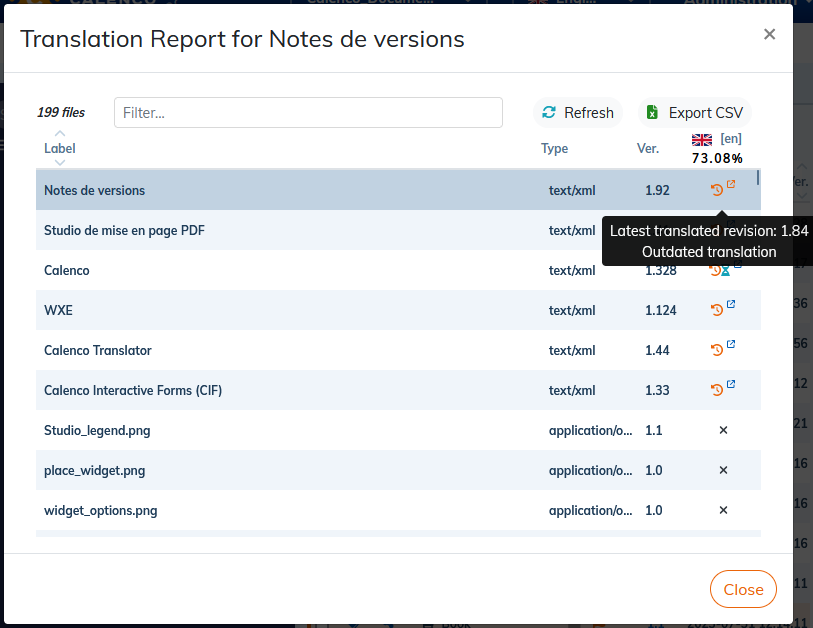
Bitmap images (png, jpg, gif) are part of the translation report for better visibility of missing images. Their translation status is linked to the modification date in Calenco. Uncheck the box “Include all images” to display only XML and SVG files.
5.1.5.1.1. Access to the translation interface
The file to be translated can be accessed in the CAT Phrase editor directly from the translation report for the source document.
Just click on the symbol next to the translation status for the desired file in the desired language. The file opens in the editor of the CAT Phrase tool (provided you have access to it).
This feature can be used with the status:
“Translation in progress” and “Obsolete translation in progress” to be able to continue the translation at any time;
“Translated” or “Obsolete Translation” to make fixes, adjust tags by revalidating translation with the Completed state (see Manage the status of a translation job).
5.1.5.2. Translation report for a translated document
In the target language, the ![]() icon allows you to access a report of the translated document to see the translation status of its dependencies in that language.
icon allows you to access a report of the translated document to see the translation status of its dependencies in that language.
The search field is used to filter the lines to display, for example, only the obsolete translations.
The column Ver. Specifies the version number of the source document. By hovering over the translation status, the number of the last translated version is displayed.
Bitmap images (png, jpg, gif) are part of the translation report for better visibility of missing images. Their translation status is linked to the modification date in Calenco. Uncheck the box “Include all images” to display only XML and SVG files.
The translated files are stored with the same name in the target language, with the same publications as the source language.
| |
If one or more target files are opened in the editor, their translations return to Calenco and update these files with the latest translated version. In general, target files should not be edited in Calenco. Any changes will not be taken into account by the translation memory stored in the CAT Phrase tool. |
The file to be translated can be accessed in the CAT Phrase editor directly from the translation report for the translated document (see Access to the translation interface).
5.1.5.3. Translation report for a content category
This report provides an overview of the translations of a workspace content category in all languages.
Select a content category by checking the respective tag.
Click on
 at the top right of the search box.
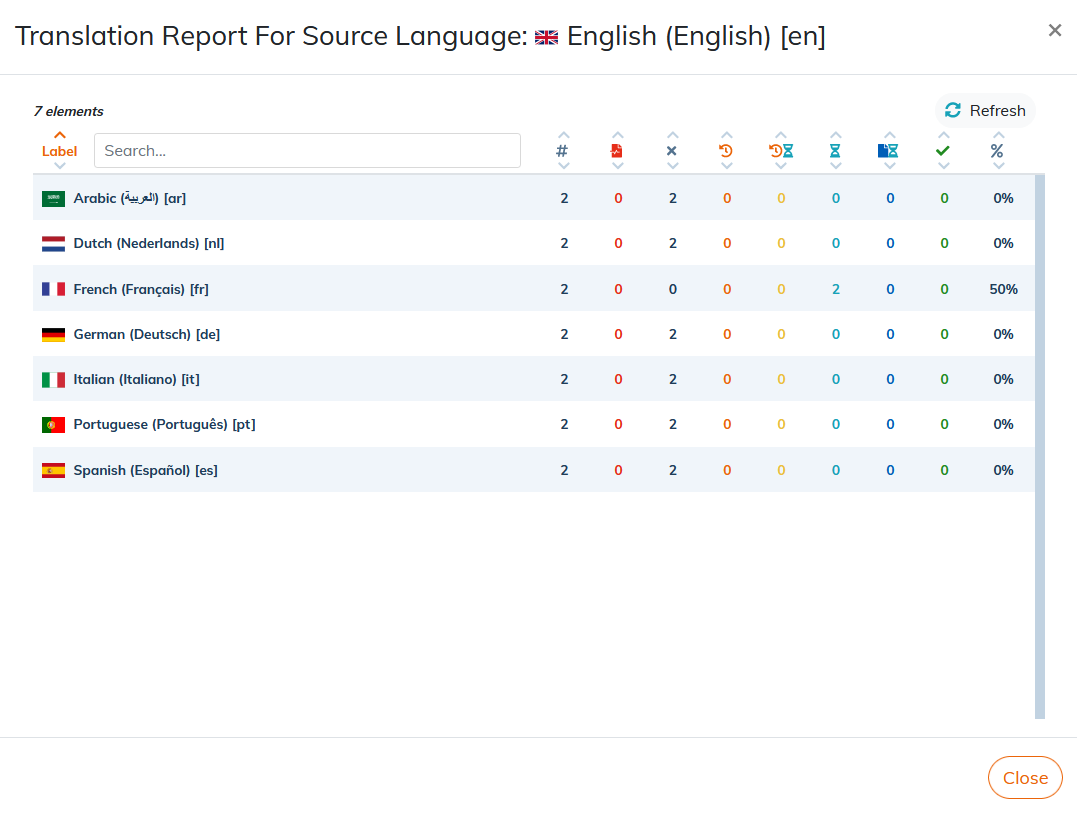
5.2. Export/import package for translation
| |
Using the option requires you to subscribe to the Calenco Translate feature and activate it for the workspace (see Activate Calenco Translation). |
The process is divided into 3 steps for which certain constraints must be respected so that the translation is well recognized by Calenco.
5.2.1. Export for translation
| |
Open dependencies. If one or more dependency files are open (being edited) at the time of the translation request, the upload fails with the following notification: Save and close all files and start a new translation request. |
From the source language of the document to be translated, click on the .
Choose the target languages into which the document should be translated:
The following dialog displays the list of files to be sent in translation with the master document.
Select the content to be sent for translation using the three checkbox options and the translation status by language:

Translation sending options:
- include in the pack if needed;
- force inclusion in the pack.
- do not include in the pack.
Click . This action generates a ZIP archive (pack).
Click , to retrieve the pack from your computer.
It is possible to download the pack via the link in the automatic email sent each time a ZIP archive is generated.
The package name is XLIFF-PACK_[unique technical name]_[source language]_[target language(s)].zip. The example above indicates that the translation request is for translation from French to English, German, and Italian. It is possible to change the name of the package with, for example, specific information for the attention of the translation agency.
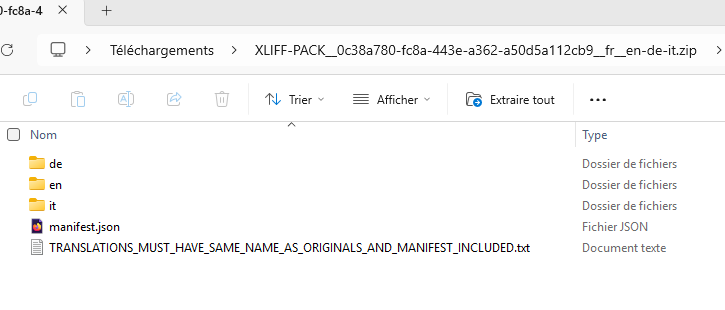
The pack consists of the following elements:
One folder per target language containing files to be translated (see details below).
a technical document manifest.json that allows the recognition of content between the export pack and the respective import pack in order to guarantee the proper return of translations in Calenco.
a README-type document that stipulates the rules to be followed, in particular:
Do not change the names of the source files. The names of the translated files must be the same as the names of the source files.
The manifest.json document must always be part of the export package and the import package.
The target language folder contains:
files of type xml in XLF format;
files of type SVG 'with content to be translated images .svg) in XLF format, if present in the documents.

The file name is composed of [File Label] - [Unique Technical Name]. [xml]. [svg].xlf
Send files from multiple workspaces for translation When the cross-workspace content sharing feature is used, it may be necessary to export for translation from multiple workspaces to reconstruct an entire document.
It is important to respect the structure of the generated archives, and not to mix files from multiple workspaces. Similarly, it is important to note the association between the name of the archives and the workspaces from which they come. This will allow each translation to be imported back into the corresponding workspace once the files have been translated.
It is therefore recommended that you rename the archive file .zip using the name of the workspace, for example
ACME_User-Guides.zip.
5.2.2. Translation
Create a translation project in the CAT tool of your choice, or use an existing project.
Extract the contents of the ZIP archive.
Bring the files to be translated from the pack into the dedicated project of the CAT tool.
It is important to bring one file at a time from each target language folder and to attach each file to the corresponding target language in the CAT tool.
Once all the files have been translated, it is necessary to place them in the respective target language folders, following these rules:
The names of the translated files must be the same as the names of the source files.
The manifest.json document must be part of the import package.
Compress the items into a ZIP archive.
In Windows, it is advisable to create a .zip archive with “Send to Compressed Folder”.
5.2.3. Importing the translation into Calenco
| |
Before you import the ZIP archive, make sure that the contents of the archive comply with the following rules:
|
In the workspace for the translated files, regardless of the language, click the button.
Select the archive containing the translations. Check the box “Import as a Translation Pack”:
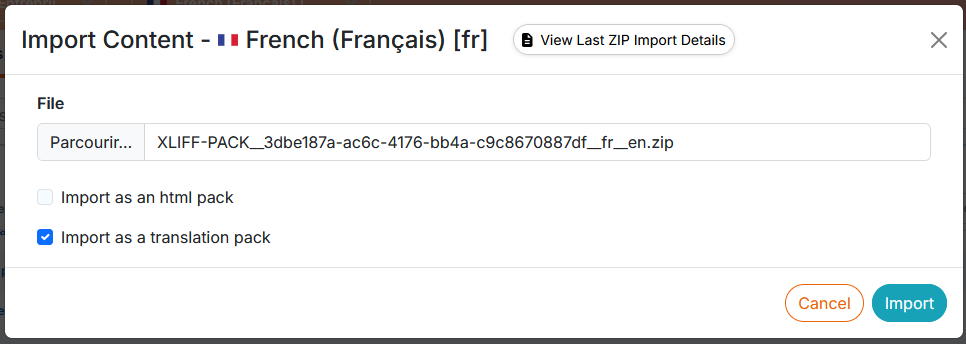
Calenco does not notify the error when the import package fails to import for translation. If the translated files are not visible in the corresponding target language, the ZIP archive must be checked for compliance and re-imported.
The export/import pack option for translation allows for staggered delivery of translations. For example:
In the case of a multilingual package, the import package may contain a folder for a language for which the translation has been finalized ahead of the other languages in the same package.
In the case of a package for a single target language, the import package can contain part of the set of files of the export package: one or more dependencies have been finalized in advance and can be reimported into Calenco to update the translated version of another master document.
The manifest.json file must be included without modification in any case.
If you use files that are shared between workspaces, new translations are automatically shared when the files are imported into their source spaces.
Limitations The following elements will need to be recreated manually if necessary:
Publications;
Classifications To tag contents.