3. To produce
Inline elements are accessible in the menu .
3.1. To insert a table
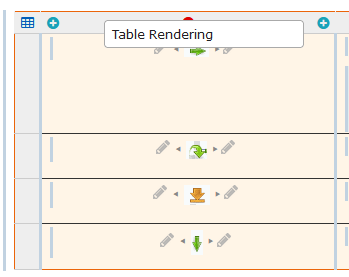
Use the icon bar to insert a table.
Use the icons  and
and  to add or delete lines or columns.
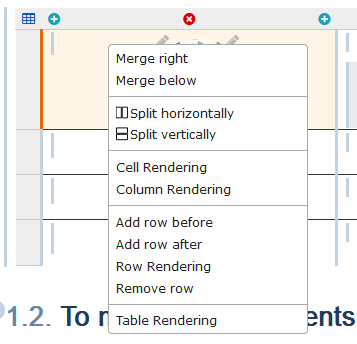
Use the menu or the contextual menu (right click on the upper gray bar, in a cell or on the gray bar to the left of a row) to modify the structure of a table or the configuration of its elements:
The icon on top left ![]() displays identifiers of lines and columns: it’s especially useful to set up calculations (Variables and functions in a table).
displays identifiers of lines and columns: it’s especially useful to set up calculations (Variables and functions in a table).
3.1.1. Check conformity of tables
This feature checks the conformity of tables. This feature is especially useful when importing files with merged cells in tables.
Other problems may arise in the tables. Refer to Detect potential issues related to profiling.
Procedure 20. To detect a potential problem while saving a document
Press
 . The following window appears:
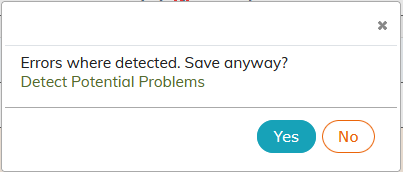
Press the message “Detect potential problems”. A list of errors is displayed.
Procedure 21. To detect a potential problem before the document is saved
In the menu → A list of errors is displayed.
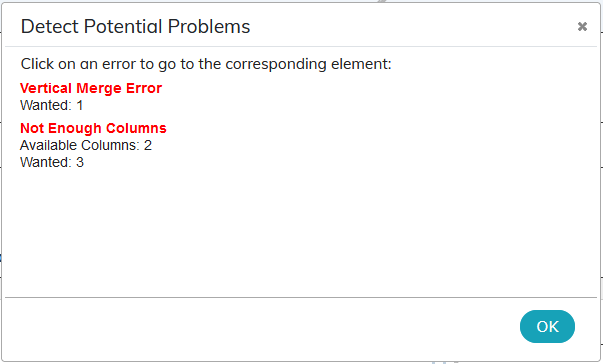
The error messages and the explanations for verification and troubleshooting are described below.
3.1.1.1. Vertical Merge Error
This issue occurs if a row with vertical merge has been copied/pasted to the last row of the table:

The publication fails with the following error message:

It is necessary to repair the broken table (see Troubleshooting issues).
3.1.1.2. Missing column(s)
This issue appears if a row with vertical merge has been copied/pasted to a row in the table:
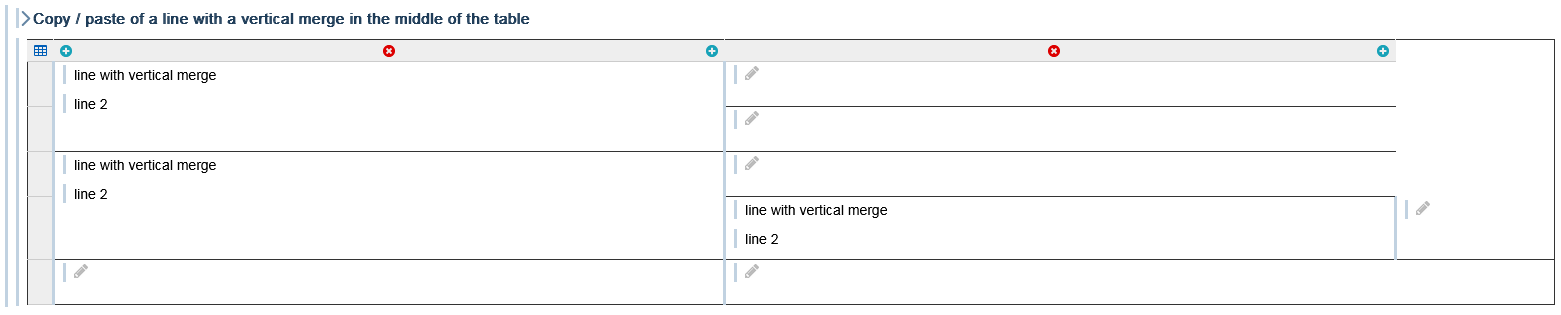
The publication fails with the following error message:

It is necessary to repair the broken table (see Troubleshooting issues).
3.1.1.3. Troubleshooting issues
![[Important]](cco-important.svg) | |
Those errors are not blocking for editing but they might be blocking for publishing: we strongly advice to resolve them when encountered. |

3.1.1.4. Missing cell(s)
This problem comes from missing cells in a row:

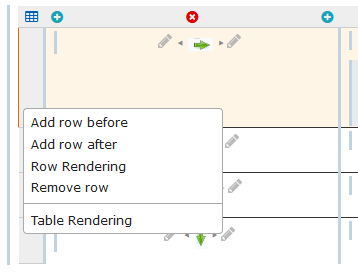
This error is not detected by → . It blocks the deletion of the line in question. It must be solved:
Place the cursor in the last cell of the row.
In the menu → , select the
Entry.Add the
Entryusing the green arrow.Repeat the procedure until the line is complete.
3.2. To insert an image
It is possible to insert images in contents. Different formats are supported:
JPG - compressed format, suitable for photos.
PNG or GIF - raster image, suitable for screenshots and graphics.
SVG - vector format, suitable for illustrations.
![[Tip]](cco-tip.svg)
SVG and translations The SVG format is supported by translation tools: this allows a single image to be shared for all languages.
![[Note]](cco-note.svg) | Other formats |
|---|---|
Other formats such as PDF or TIFF can be used as images but are not recommended because not necessarily compatible with all your publication formats. |
Click on menu , then choose or depending on the case:
To insert a simple image;
To insert an image with title;
To insert an image containing hotspots;
To insert an image editable with the editor of images integrated to Calenco (SVG format);
To insert an inline media or an image in the text
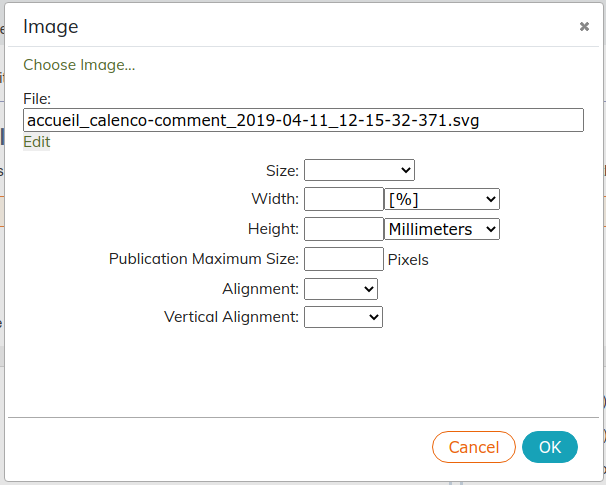
Set the cursor where to insert and click on icon
 to choose the image to integrate and set up its publication:
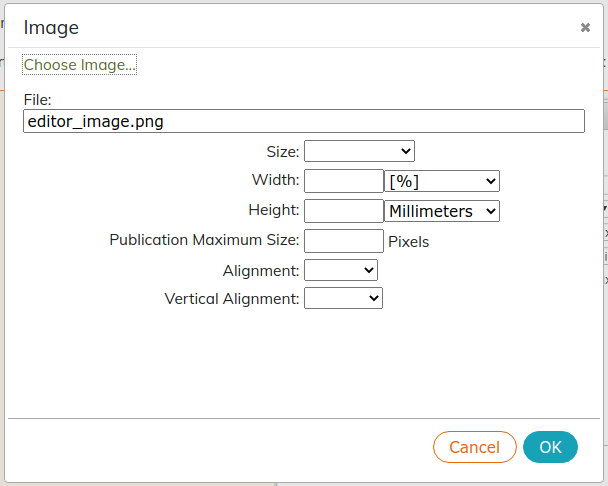
Preferably specify a relative size (as a percentage of the available space). In general, adjusting the width is enough, as height is adjusted proportionally.
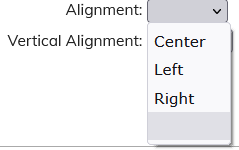
By selecting the empty option
 in the or menu, the image will be aligned with one of the three options set by default in the style sheet.
Click on .
Selecting the import language Don’t forget that images like contents:
are broken down by language,
can be filtered by tag for easy finding.
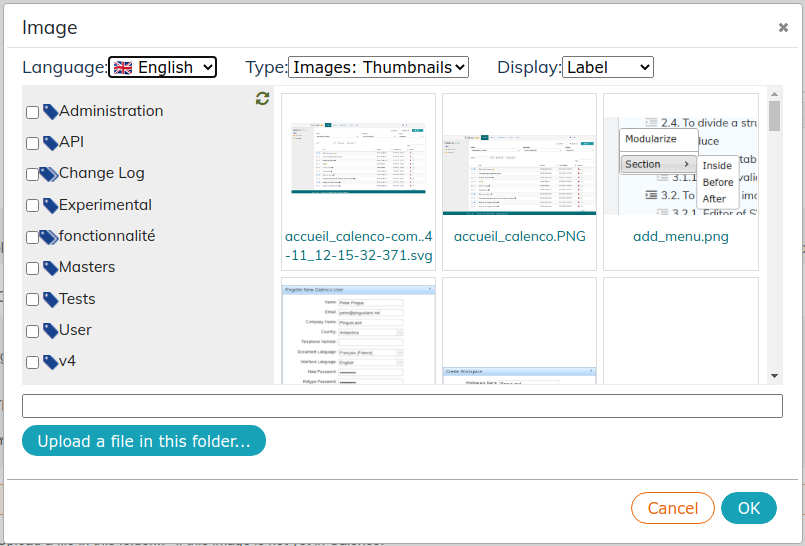
Click on if this image is not yet in Calenco:
![[Caution]](cco-caution.svg)
Make sure that no file name contains accents, spaces or special characters (+, &, ... ). If the name is not accepted by the editor, the following error message appears:
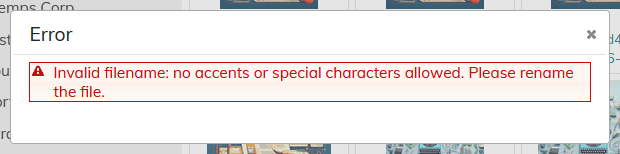
Uploaded images will be associated with tags selected when uploading.
You can also upload an image in Calenco from the editor:
Open the image to embed on your computer.
Copy the image in the clipboard (right-click on Ctrl+C).
Choose the place where to insert the image.
Paste (Ctrl+V or Cmd+V for users on macOS) the image in the area for editing.
The image is saved in the language of the document.
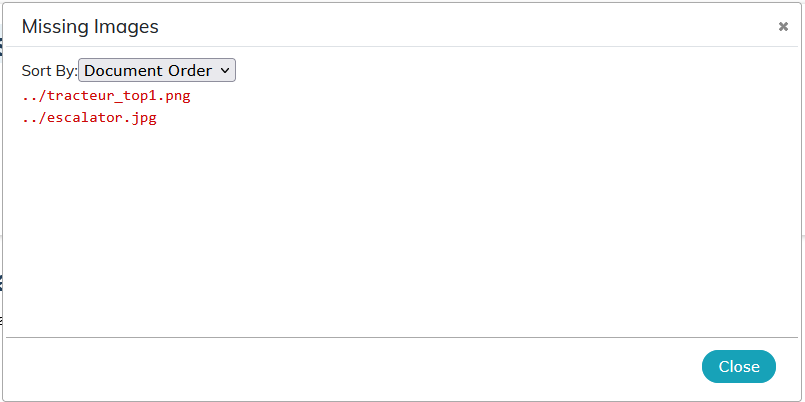
3.2.1. Searching for a missing image
Sometimes, the document references images but they are not loaded by the editor. These missing images look like this:
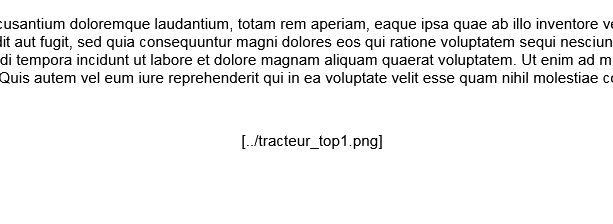
The most likely cause of this behavior is the absence of images in the target language when the translation document is returned (see What is sent for translation?).
3.2.2. Illustration editor
The illustration editor lets you create (see Create an annotated image) and edit images in SVG format.
To access the editor from an image, click under the image name:
A new window appears:
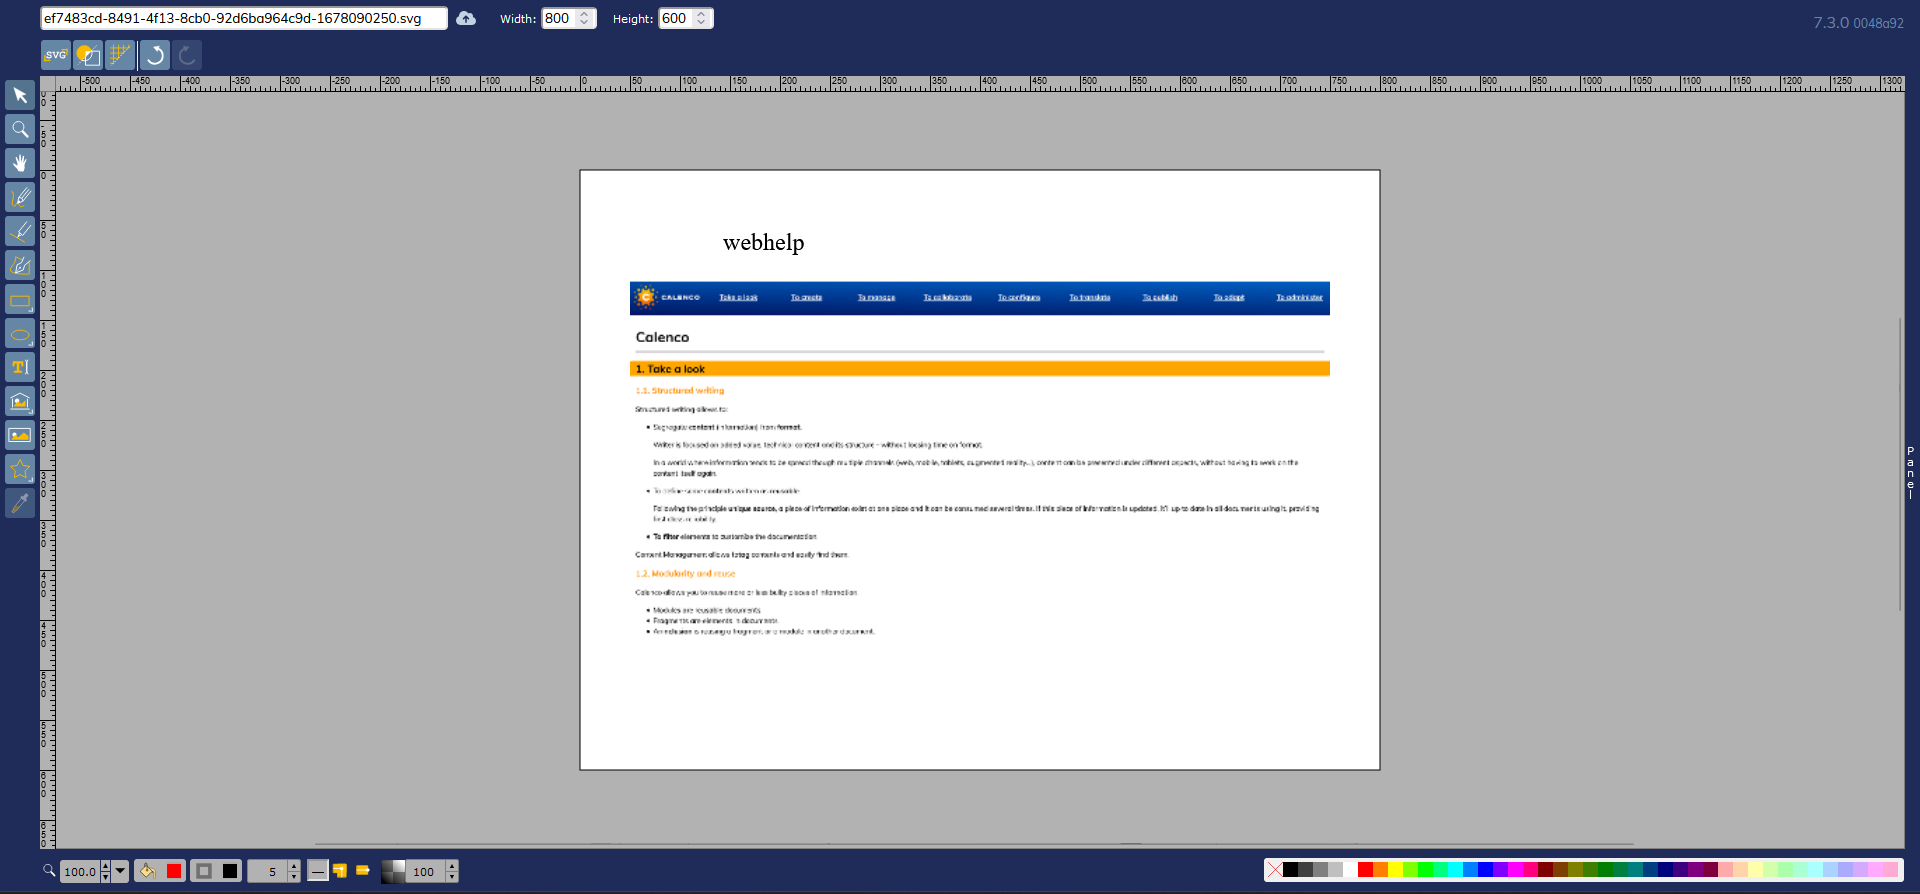
The following features are available in the icon bar on the left:
|
|

| Translation |
|---|---|
The texts written with the drawing editor are supported by the translation tools: each text element is a translation segment. |
3.2.3. To generate a QR code
A QR code is an image that contains coded information. Any QR code can be inserted as an image.
Calenco also allows you to dynamically create QR codes during publication: this avoids the creation of the image.
Click on the menu → .
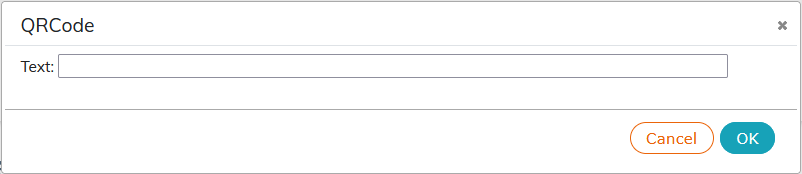
Place a URL link in the Text field and validate.
Choose the location of the QR code in the document and give the name to this image.
3.3. To create equations
An equation is created with the menu → .
Click the item that contains a question mark
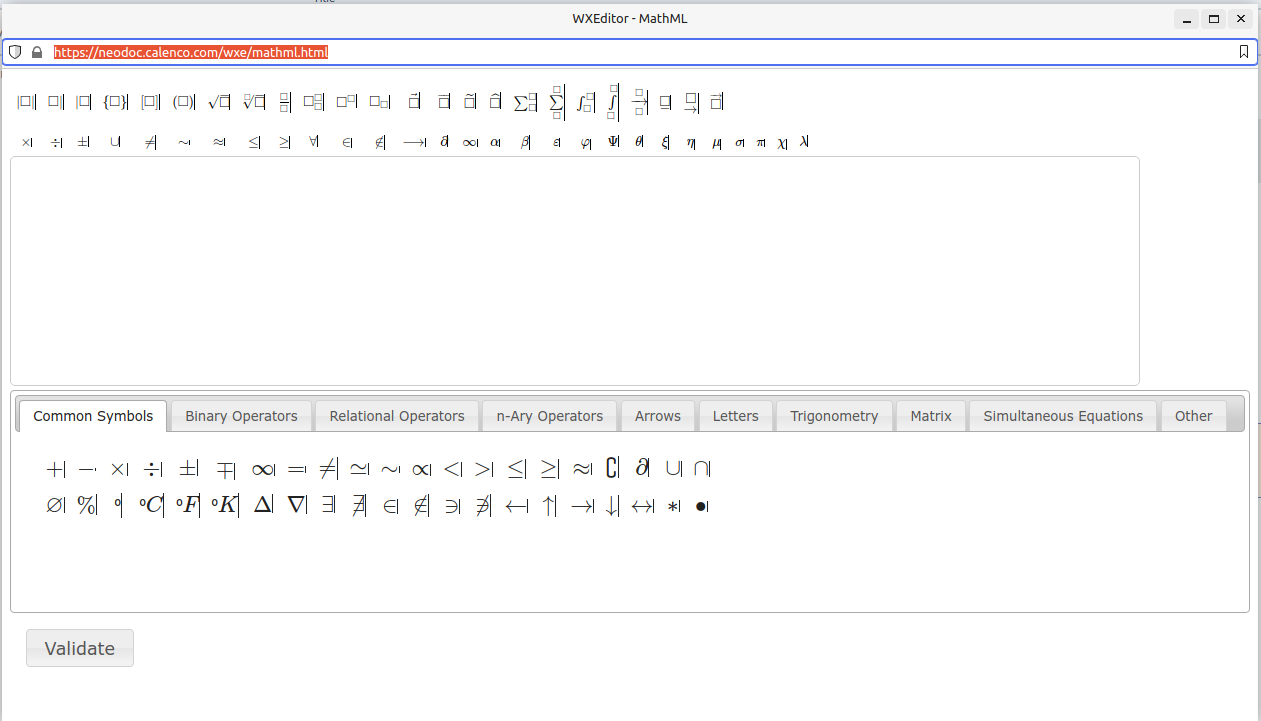
Build the equation with the different features.
Click on the equation to edit.
3.4. Create a bibliography
There are several methods for creating a bibliography.
Procedure 24. Creation in the Calenco interface
Click on
 Create.
Give a title to the bibliography.
Choose the
bibliographyelement in :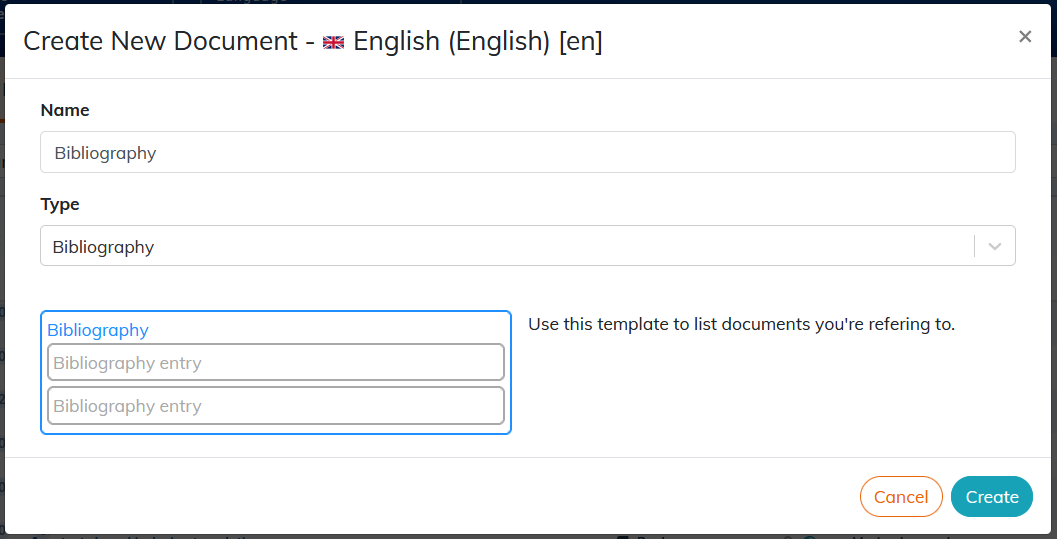
Click on : the content editor opens the bibliography created in a new tab.
Procedure 25. Creation in an existing document
Open the document.
Click on the → menu.
Add the
bibliographyelement.
3.4.1. Edit a bibliography
The bibliography is made up of the bibliographic entry elements.
When created, the bibliographic entry element is composed of a few default elements: author, reference, bibliographic identifier, title, abstract etc.
It is possible to compose an entry from the combination of relevant items for a bibliography. These items are found in the → menu (To customize).
| |
The description of the elements is available in the DocBook guide. |
A bibliographic reference makes it possible to make the link between the bibliographic entry and its reference in the text.
Place your cursor where you want to insert the bibliographic reference.
Click on the → menu:

The link between the reference and the bibliographic entry is made via the identifier of the latter.
If the bibliographic entry does not have an identifier, Calenco generates one.
3.4.2. Reuse a bibliography
The bibliography can be modularized from the editor if it is created in an existing document To modularize content.
![[Warning]](cco-warning.svg) | |
If the bibliography is modularized, only identified bibliographic entries are visible and selectable. |
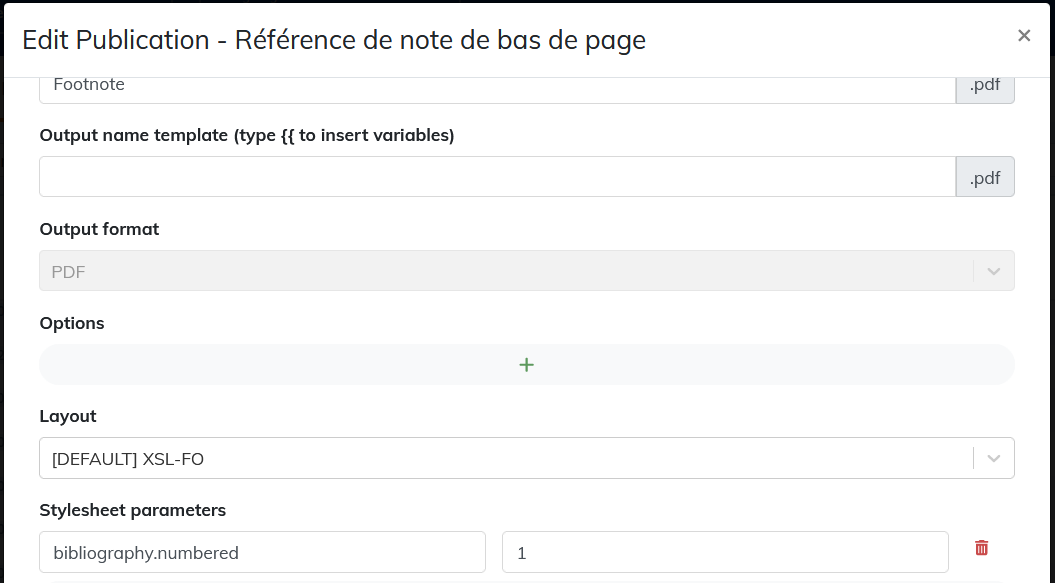
3.4.3. Publish a bibliography
It is recommended to set the publication with bibliography.numbered = 1 to publish a number corresponding to each bibliographic reference.
| |
A customization of the publication style sheet makes it possible to publish only the bibliographic entries cited in the document. Please contact your usual NeoDoc contact ( |
3.5. Create a glossary
There are several methods for creating a glossary.
Procedure 26. Creation in the Calenco interface
Click on
Create.Give a title to the glossary.
Choose the
glossaryelement in :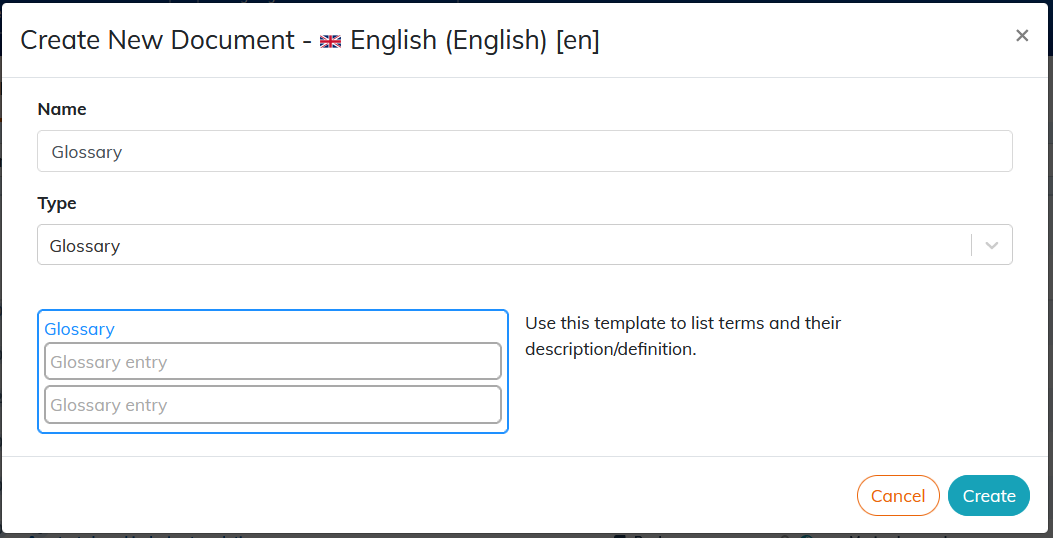
Click on : the content editor opens the created glossary in a new tab.
Procedure 27. Creation in an existing document
Open the document.
Click on the → menu.
Add the
glossaryelement.
Procedure 28. Creation of an automatic and filtered glossary
Open the document.
Click on the → menu.
Add the empty
glossaryelement.In the → menu (in the left area of the editor) place “auto”.
Retrieve the url link of the glossary created beforehand, modify it by deleting a part:

Place the link in the
glossary.collectionpublication parameter (Publish a glossary).Glossary terms that are not cited in the document are not published.
3.5.1. Edit a glossary
The glossary consists of entry elements.
On creation, the entry element is composed of the elements: term, definition.
It is possible to add other optional elements. These items are found in the → menu (To customize).
| |
The description of the elements is available in the DocBook guide. |
Using the term element for words or groups of words in the text of the document allows reference to glossary entries.
Select the text to set as a term.
Click on the → menu.
Content defined as
termappears in italics in the publication.
3.5.2. Reuse a glossary
The glossary can be modularized from the editor if it is created in an existing document To modularize content.
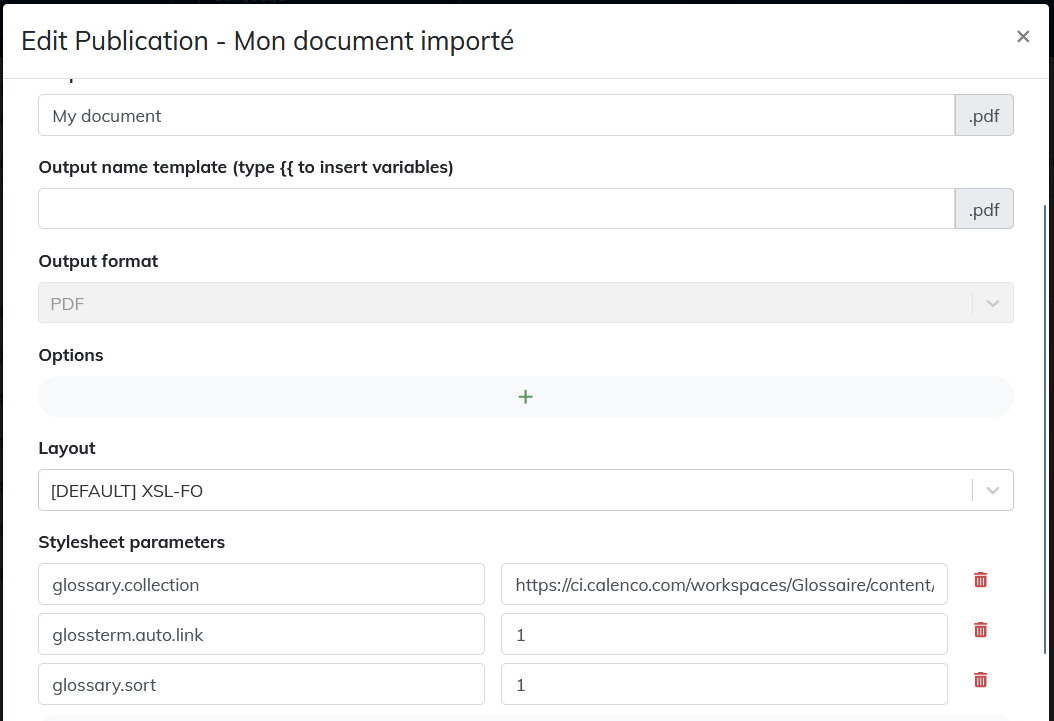
3.5.3. Publish a glossary
Using the glossterm.auto.link = 1 parameter creates a link between the word defined as term in the text and the corresponding entry in the glossary.
Using the glossary.sort = 1 parameter will publish glossary terms in alphabetical order.
Using the glossary.collection parameter allows you to publish only the terms cited in the document (Procedure 28, “Creation of an automatic and filtered glossary”).
3.6. To add a title
Titles are mandatory for structure elements.
In structured documentation, using a title when possible is strongly advised.
Click on contextual menu of the element or in the icon bar → → .
3.7. To specify information
The information element, located at the very beginning of the document, allows you to store information that is sometimes not published (author's name, reference number, product identifier, table of revisions, etc.). The commonly used elements are available in the menu .
3.8. To insert a page of a PDF file
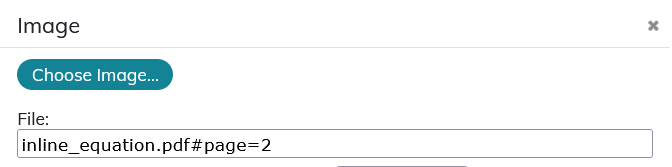
A page of a PDF file can be referenced for publication as an image.
A PDF must be stored in Calenco in the appropriate language.
| |
Once imported, the PDF file is only visible by administrators. |
Syntax to point to the page is the following: file name.pdf#page=page number
3.9. To integrate audio or video
A PDF publication is not appropriate to integrate video and Calenco is not the place where your contents are stored.
The most effective way is to refer to a web address where the recording is stored and accessible to the target audience:
Click on the → menu.
Insert the full url link in the
filerefattribute.
Videos are published as a link (for PDF publications) or in an online player (for HTML publications).
3.10. To migrate content in Calenco
Select the text from the source file, such as a Word document or a web page.
Copy it (Ctrl+C).
Paste it in the editing area where needed (Ctrl+V).
Imported text keeps its original structure.
To paste the text without formatting, use the shortcut Shift+Ctrl+V.
3.10.1. Detect an error in the document
When opening a file with a text that is incorrectly placed in Calenco, the editor renders it in view “XML”, with the following error message:

The most common causes of this error:
import of a poorly structured file;
file when the translation comes back with problems on the tags.
| |
We remind you that structured writing requires you to place the content within the tags. |
Procedure 29. To repair the imported document:
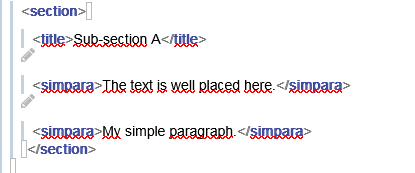
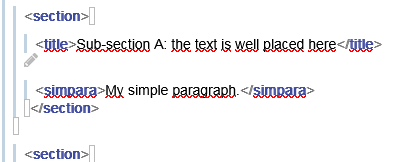
Place the text inside an existing element:
OR
Add a necessary element for this text:
Move the cursor as close as possible to where you want to add the item.
Click → :
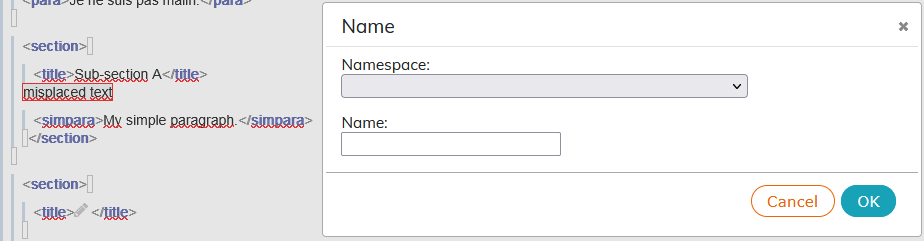
Enter the name of the DocBook item and confirm.
The names of the elements are available in the DocBook guide.
Paste the misplaced text inside the tags:
Save the document, close it, and reopen it in the editor to check its validity:

OR
Remove misplaced text if necessary.
Procedure 30. To repair the document when the translation returns:
Check the tag match and the relevant content between the source language and the target language in the CAT tool editor. (see Assess the quality of the translation)
Return the document to Calenco using the task's multiple validation procedure (see Manage the status of a translation job).
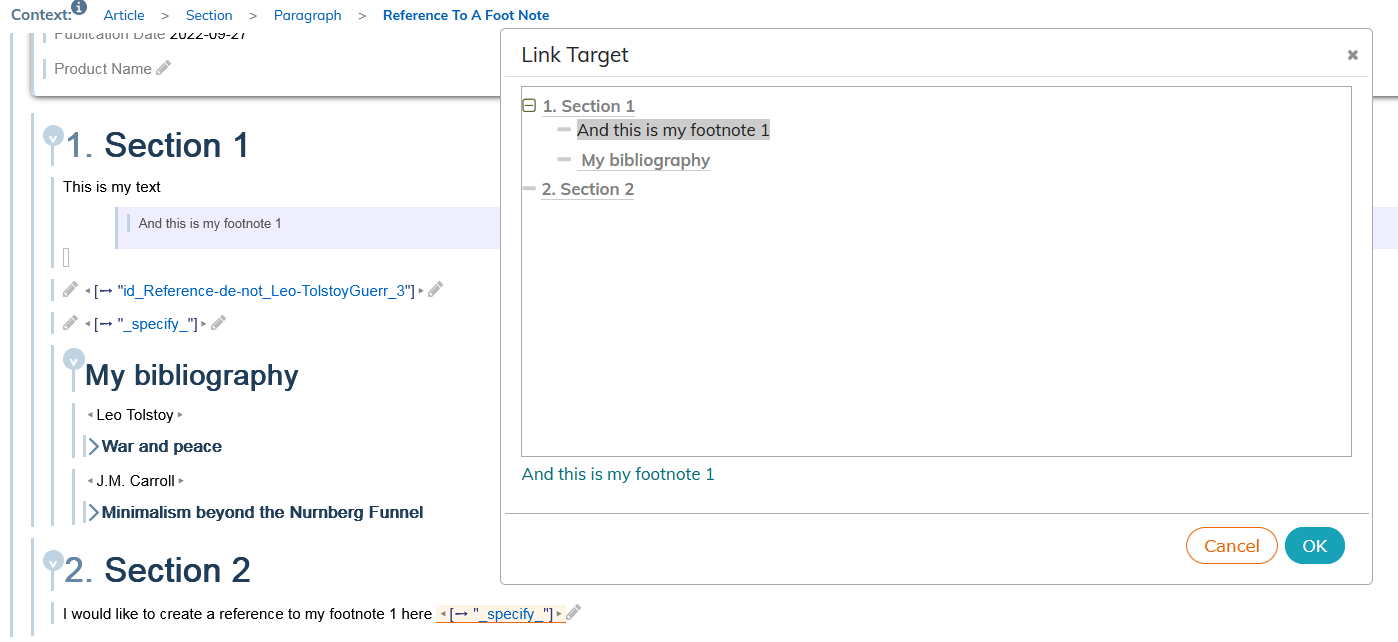
3.11. Insert a cross reference
A cross reference allows you to make a link in the document to another part of the same document.
Position your cursor where you want to insert the cross-reference.
Click the → , or use the quick tools on the left:
The target elements with a title are listed in the dialog box that appears:
Learn how To add a title

Titles without an identifier appear in gray with a floating message and are not clickable.
If you want to refer to an element which is not listed, click on .
Make sure that the target element is identified (To identify).
The identifier for structure elements must be placed over the entire element, not just its title.
Click on
"_specify_"to open this dialog: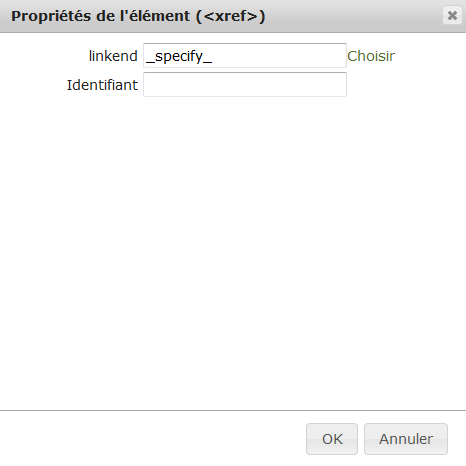
Click To view a list of items identified in the document:
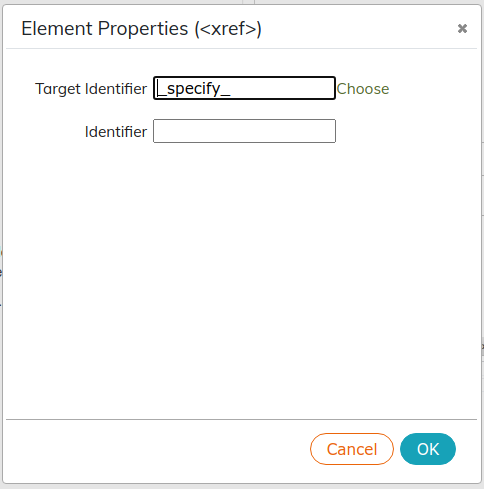
Select the target identifier.
3.12. Insert an internal link
An internal link allows you to make a reference to another element in the document.
Position your cursor where you want to insert the internal link.
Click on the menu → :
The target elements with a title are listed in the dialog box that appears:
Learn how To add a title
Titles without an identifier appear in gray and cannot be clicked.
Select a target element and enter the text between the tags.
If you want to refer to an element which is not listed, click on .
Make sure that the target element is identified (To identify).
The identifier for structure elements must be placed over the entire element, not just its title.
Select the item
Internal link. In the list of attributes, replace"_specify_"by the identifier given to the target element: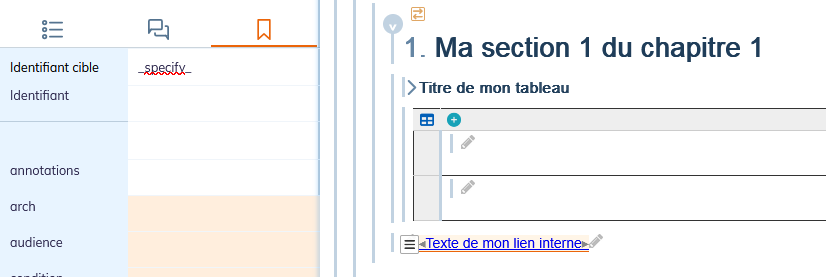
3.13. Insert an external link
An external link makes it possible to make a reference to a web address.
Select the content for which you want to insert the external link.
Click on . A dialog box opens asking you to insert a url link in the dedicated field:
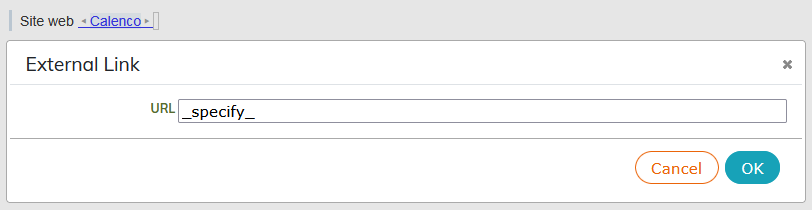
Validate with OK.
The link is automatically placed in the
hrefattribute: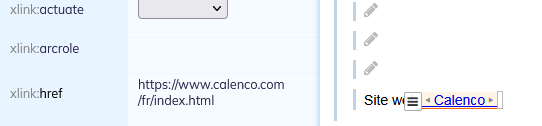
3.14. Adapt content (cut/copy/paste)
Select the element.
Use standard shortcuts (Ctrl+ or Ctrl+ and then Ctrl+) to move or duplicate content.
| Multiple content selection |
|---|---|
Click on the vertical bars of the elements to select maintaining the key Shift pressed. You can only select several elements at the same level of structure. |
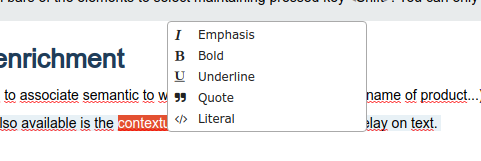
3.15. Text enrichment
The menu allows associating semantics to words (element of user interface, name of product...).
It is possible to define some text enrichment options by selecting a text with the mouse:
| |
Style hierarchy. To make a text in bold italics, it is necessary to place this text first in the |
3.16. Add Hard Page Break
Calenco publishes content following the logic of the style sheet: inserting a manual page break forces the behavior of the publication.
Select the element before which you want to insert the manual page break.
→ .
3.17. Insert a list
Calenco offers three types of lists ( ):
Bulleted list: bullet characteristics are managed by the style sheet.
Ordered list: the type of numbering (numbers, letters, other) is managed by the style sheet.
List of definitions.
| |
Continue numbering an ordered list. To continue numbering with the index following the last index of a previous list, the 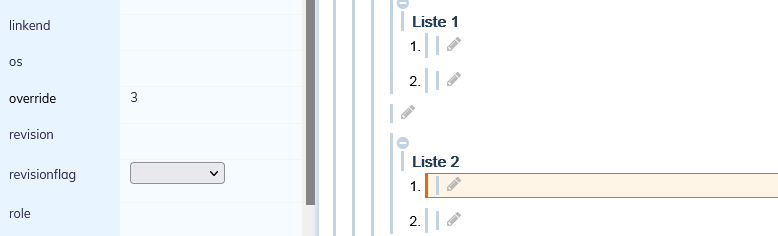 |
| |
To visualize the index with which an ordered list begins in the editor. To visualize the index with which the list begins, select the  |
3.18. Insert a footnote
Position your cursor where you want to insert the footnote.
Click the → menu.
Type the text in the dedicated area.
It is possible to make a reference to the footnote in a document.
Position your cursor where you want to insert the cross-reference.
Make sure the target footnote is properly identified (To identify).
Click the → menu:
Select the desired target and validate.
3.19. To insert a watermark
There are several methods to publish a document with a watermark.
Procedure 32. Method 1: Default “draft” watermark
Select the document at the root element.
Set the status attribute to
draft.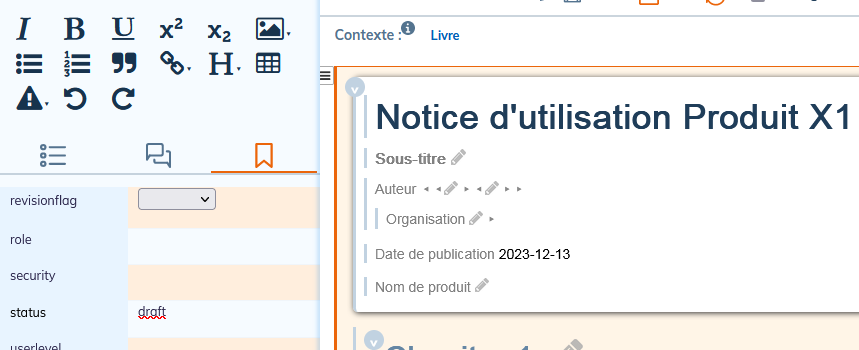
Procedure 33. Method 2: Custom watermark
Upload an image that contains the desired watermark (draft, draft, preliminary, etc.) in .png format in your workspace:
in the Common language if the reference remains unchanged for the language versions of the documents;
in each of the languages if the mention is to appear translated into the respective language of the document.
All images must have the same file name as the source language.
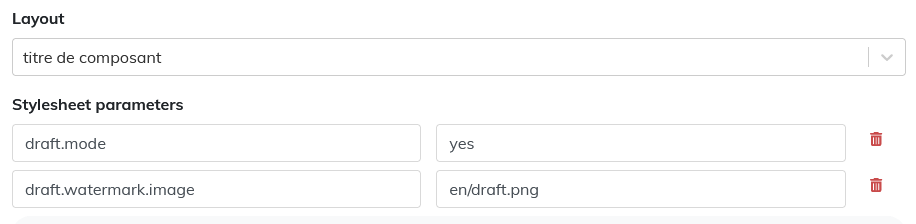
In the publication, customize the style sheet settings:
Setting the watermark mention
draft.watermark.image=draft.png, if the image is in the Common language.
draft.watermark.image=en/draft.png for publications in English (or language code equivalent to other languages needed).
Activating the watermark
draft.mode=yes to publish the watermark on all pages of the document;
draft.mode=no to disable the watermark for the entire document;
draft.mode=maybe to publish the watermark only for structural elements of the document for which the
statusattribute is set to draft.
| |
By default and according to typographical rules, the watermark is displayed behind the content of the documents. Customizing the style sheet allows the watermark to be displayed in front of the content. Please contact your usual NeoDoc contact. |
3.20. To associate a text to its description
Some text content can be marked with a circle and a number inside and be linked to its description in the document.
The content to be described is presented by the co element. The co element must be integrated into one of the following:
literallayout,
programlisting,
classsynopsisinfo,
computeroutput,
funcsynopsisinfo,
prompt,
replaceable,
screen,
synopsis,
systemitem,
userinput.
The majority of these elements are used to reproduce the computer (programming) environment. The literallayout has the semantics closest to the element simpara (simple paragraphe) most often used for text blocks. This element will be used below for the configuration of cos.
The description is wrapped in the element calloutlist made up of the callout elements.
In Document, insert the
literallayoutvia the menu → . Write text for the item you want to describe.With the menu → , insert an element
coinside the elementliterallayout.Repeat steps 1 and 2 for all the elements you want to describe.
Give each
coelement an ID.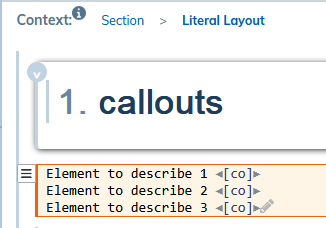
Add the
calloutlistelement via the menu → .Add as many
calloutelements that there are elements to describe with the menu → .Give each
calloutan ID.Create a link between each
calloutand its respectivecoby placing:the identifier of the
coin thearearefsattribute of thecallout: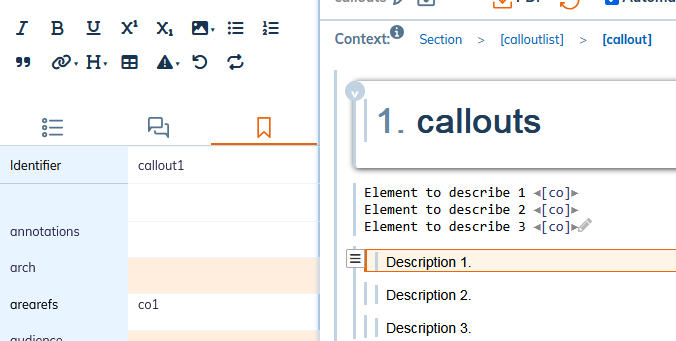
the identifier of the
calloutin thelinkendsattribute of theco.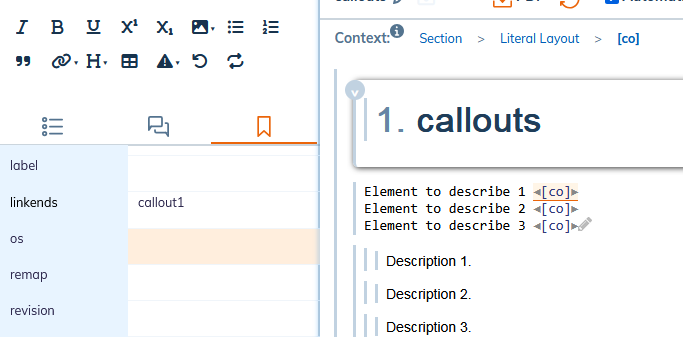
Publish the document.
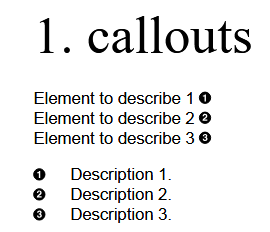
By default, the dots are black circles with white numbers. Any change to the default rendering represents further expansion of the style sheet.